King Somborne
Table of Contents:
Introduction
Site visit
Cottage modelling
Asset modelling
Combination and rendering
Client feedback
Conclusion
Introduction
This project was working in partnership with a masters student at the university of Winchester writing a report cantered around building and cottages built in the 1500’s looking at their development and how they have changed over time. Therefore in this project me and a group have been working to document their 1500’s cottage they are staying in. We were tasked with a variety of roles which we could be completing. The tasks chosen for this project included creating a digital copy of their floor plans and documenting the interior of their home in the 1900’s period to give a sense of what it would have been like back then. Additionally to this due to some complications there were assets made for the 1500’s period.
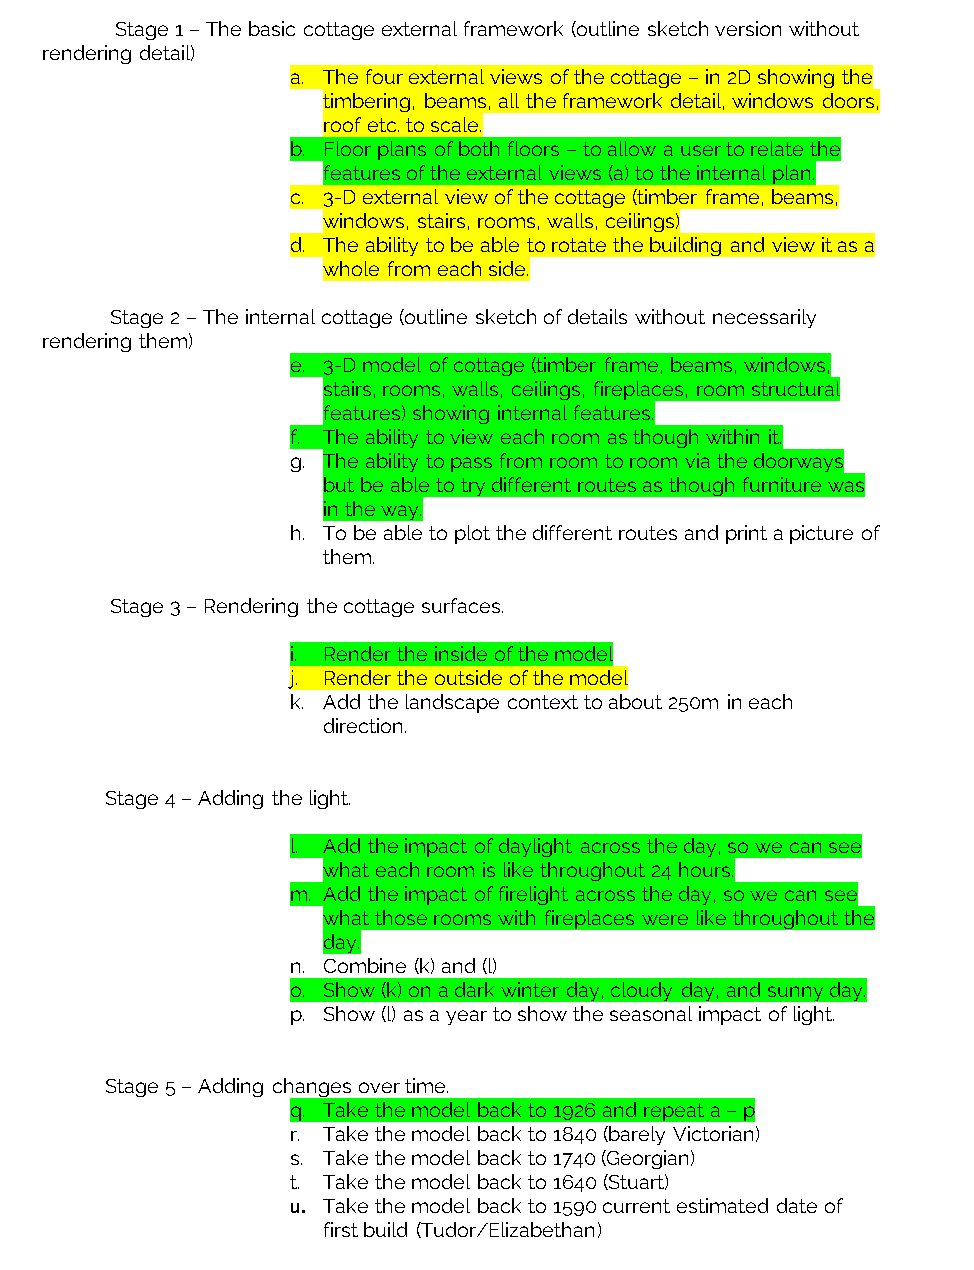
Client stages:
Green have been completed and or attempted by me
Yellow has been completed by someone else within the group
Site visit
In order to get the best understanding of the property and the work we was being asked to do, there was an appropriate site visit in which we met the client being given a tour and run down of their home and the understanding of the history behind it from its presumed construction in the 1500’s up until now. To then after take numerous photos around the site to be used to create the model however, this was difficult for me due to the clients privacy preferences around the inside of their home not many photos were taken of the inside, though images were taken of the walls and beams to be used for texturing my scene in order to get a more accurate level of detail to their home.
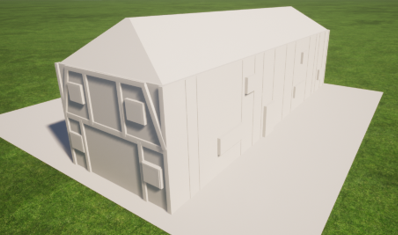
Cottage Modelling
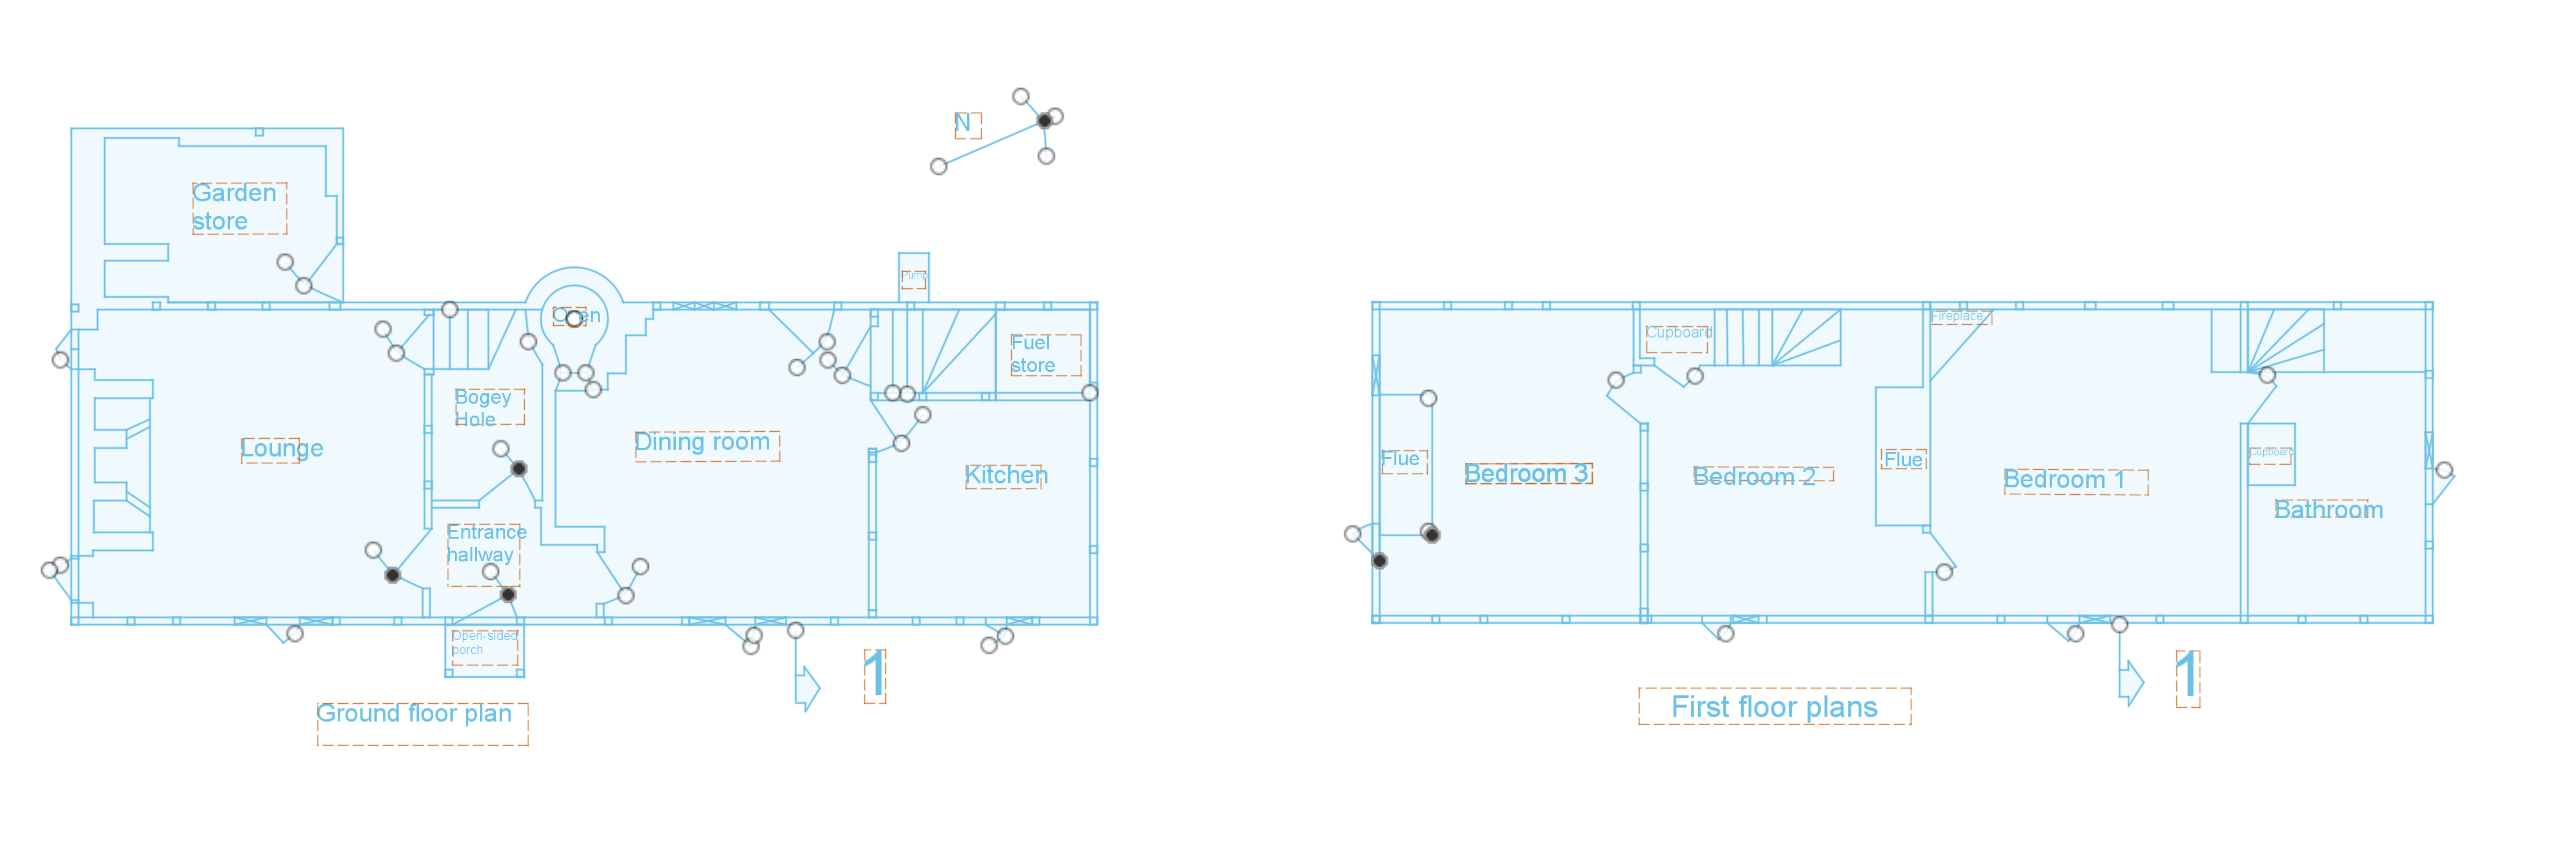
After visiting the site the first task that I aimed to do was produce the floors plans based on the ones seen at the property, these were photographed with a £1 coin for be used for scale to produce a more accurate plan. The software chosen to produce this was fusion 360 as I have experienced using it and I know the capabilities it has to produce a floor plan. Additionally using the canvas tool to over lap the photograph with the sketch allowing the image to be traced digitally.
For this project I decided to do something different as previously I have created my buildings before using Revit but after doing some research into the field of visualisation I wish to go into I decided to change the software I used to produce the main form of the model this being 3ds Max. This to begin with was very difficult as I did not know how to use the software at all and additionally I was struggling to learn it and it’s features on my own therefore I chose to find a variety of tutorials that I could follow to get a basic understanding for this project the main one of which was by a company called Viz academy (Vizacademy, n.d) in which provided free video tutorials around the software to follow.
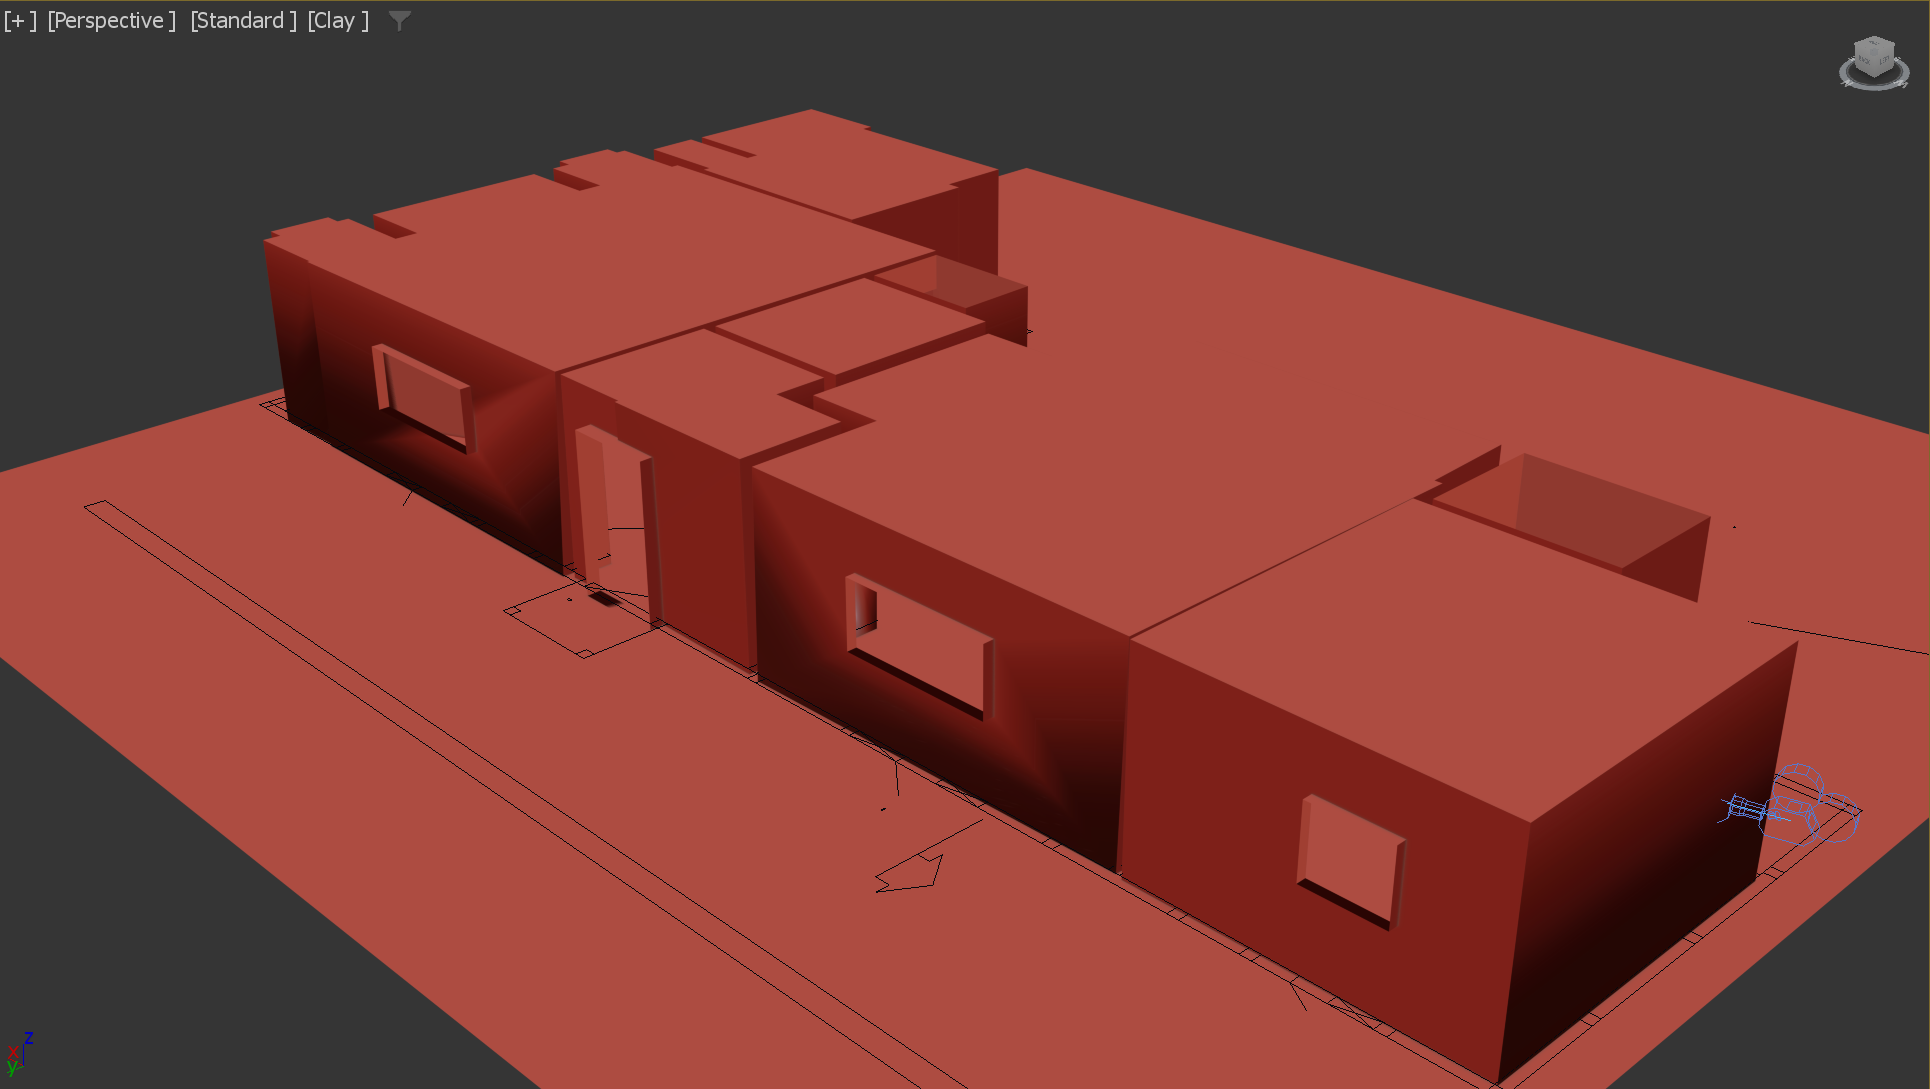
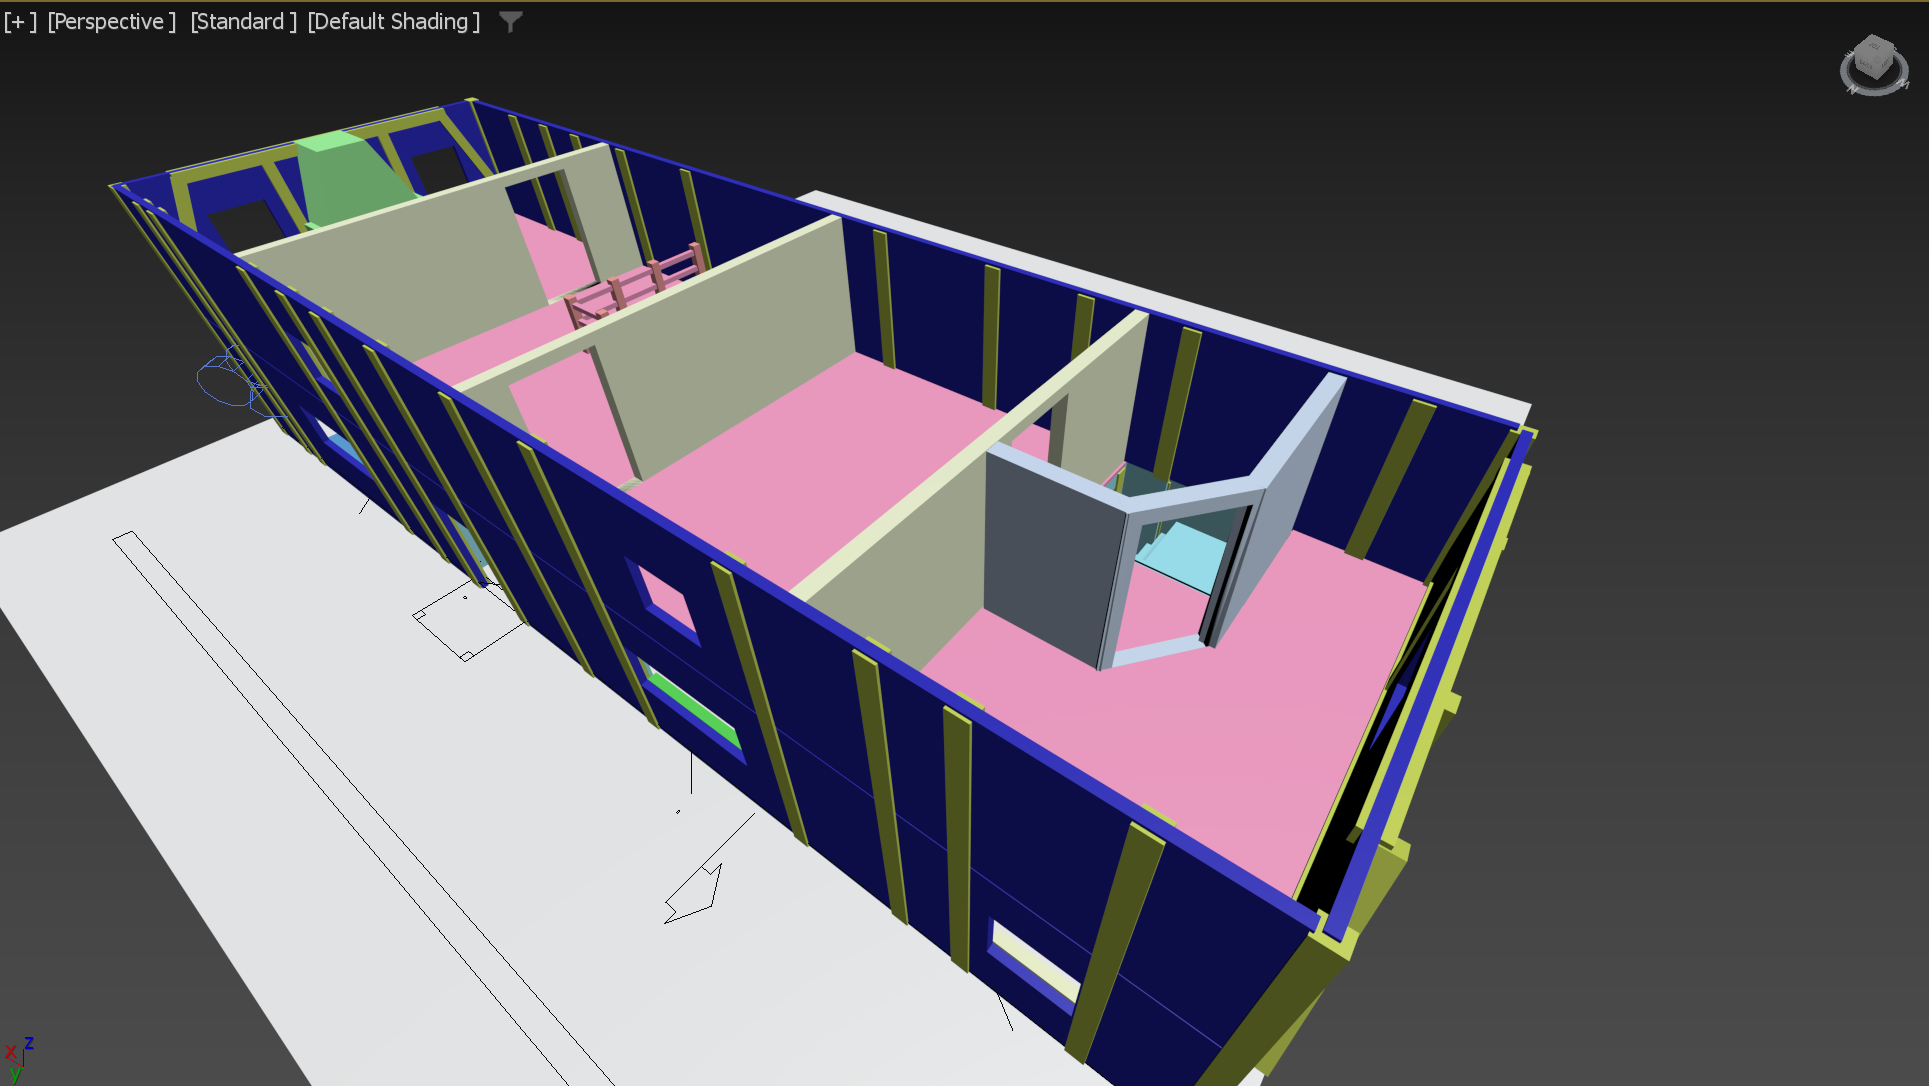
Therefore following a Viz academy video I took my floor plans created on fusion 360 as an overlay to produce the cottage model, creating each room of the first floor individually with the box tool then creating the boxes for doorways and windows to be joined then removed using the Boolean tool though when I done this I came to an understanding that doing the box tool didn’t have a thickness therefore If I was to remove a will there was a visual cavity you could see as a result of this I decided to go back on my design and separately input the walls and beams to create the rooms and giving the model more faces to work with.
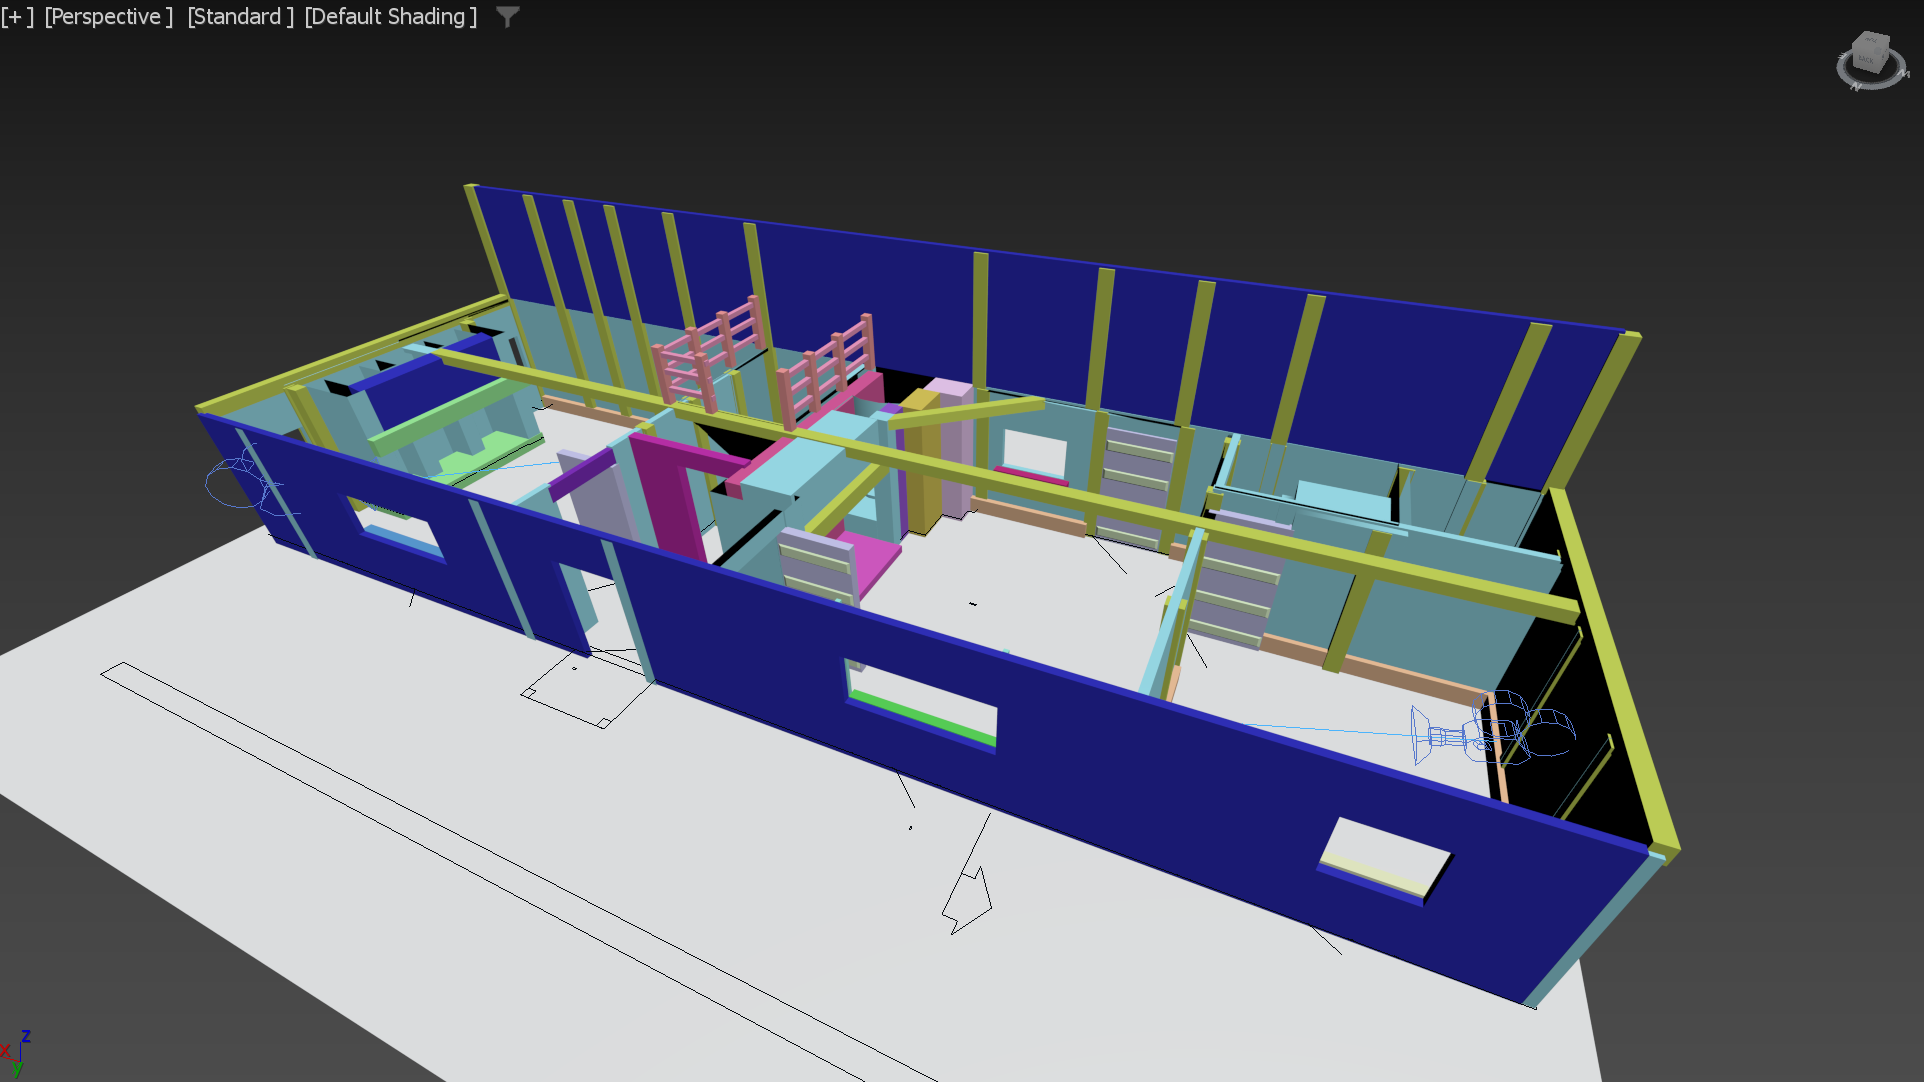
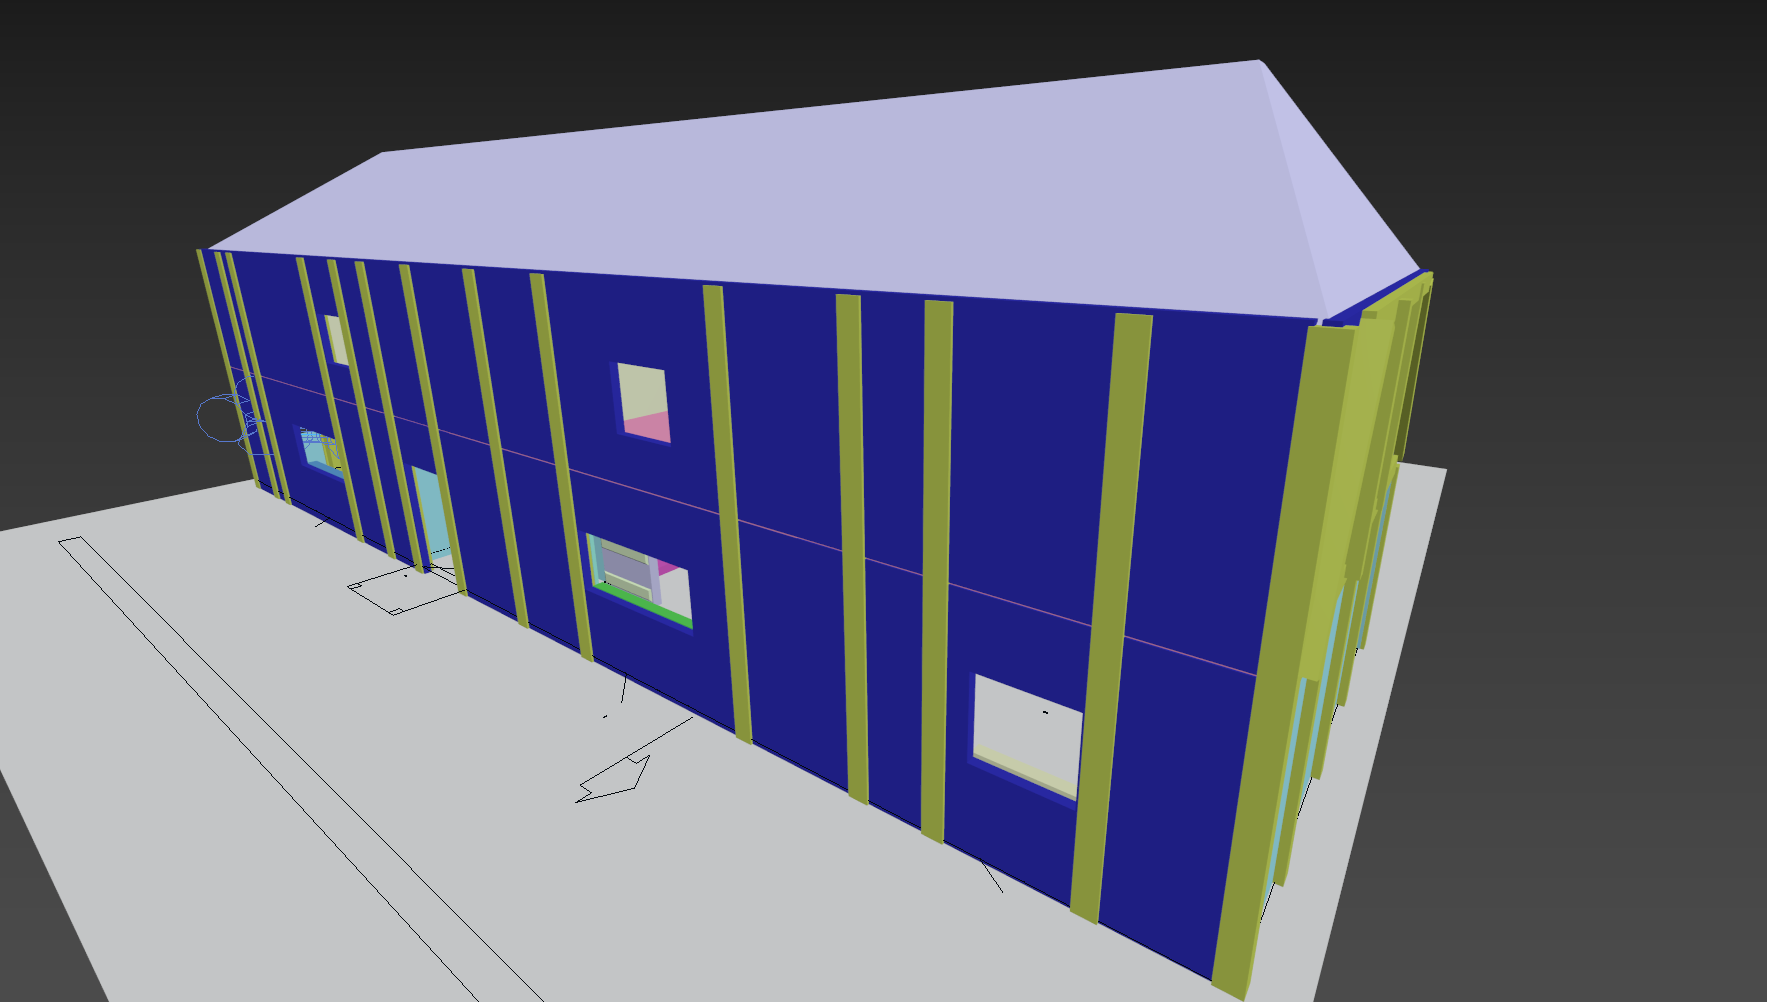
Once the bottom floor was produced to an accurate level it seemed necessary to create the second floor, for this I followed a similar process as the ground floor by creating a second floor using the a plane to cover the first floor and act as a second floor once that was completed I inputted the walls and beams like previously mentioned and inputted the doors and windows to then be joined and removed with the Boolean tool. After the second floor was to an acceptable level the roof was additionally added to the model to provide a ceiling for the second floor and add that extra level of detail, this was produced by placing a box on top of the second floor walls and turning it into an editable poly this allowed me to manually alter each face, edge and vertices of the body, using this tool allowed me to form the roof into the shape for their thatched roof.
Asset Modelling
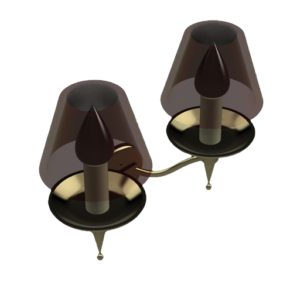
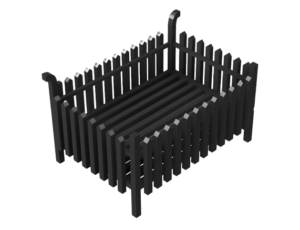
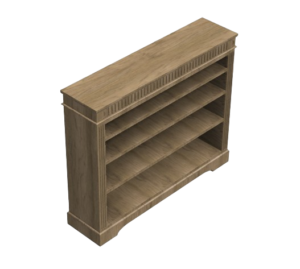
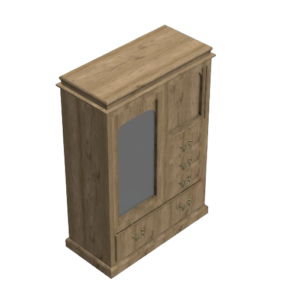
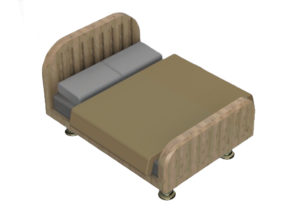
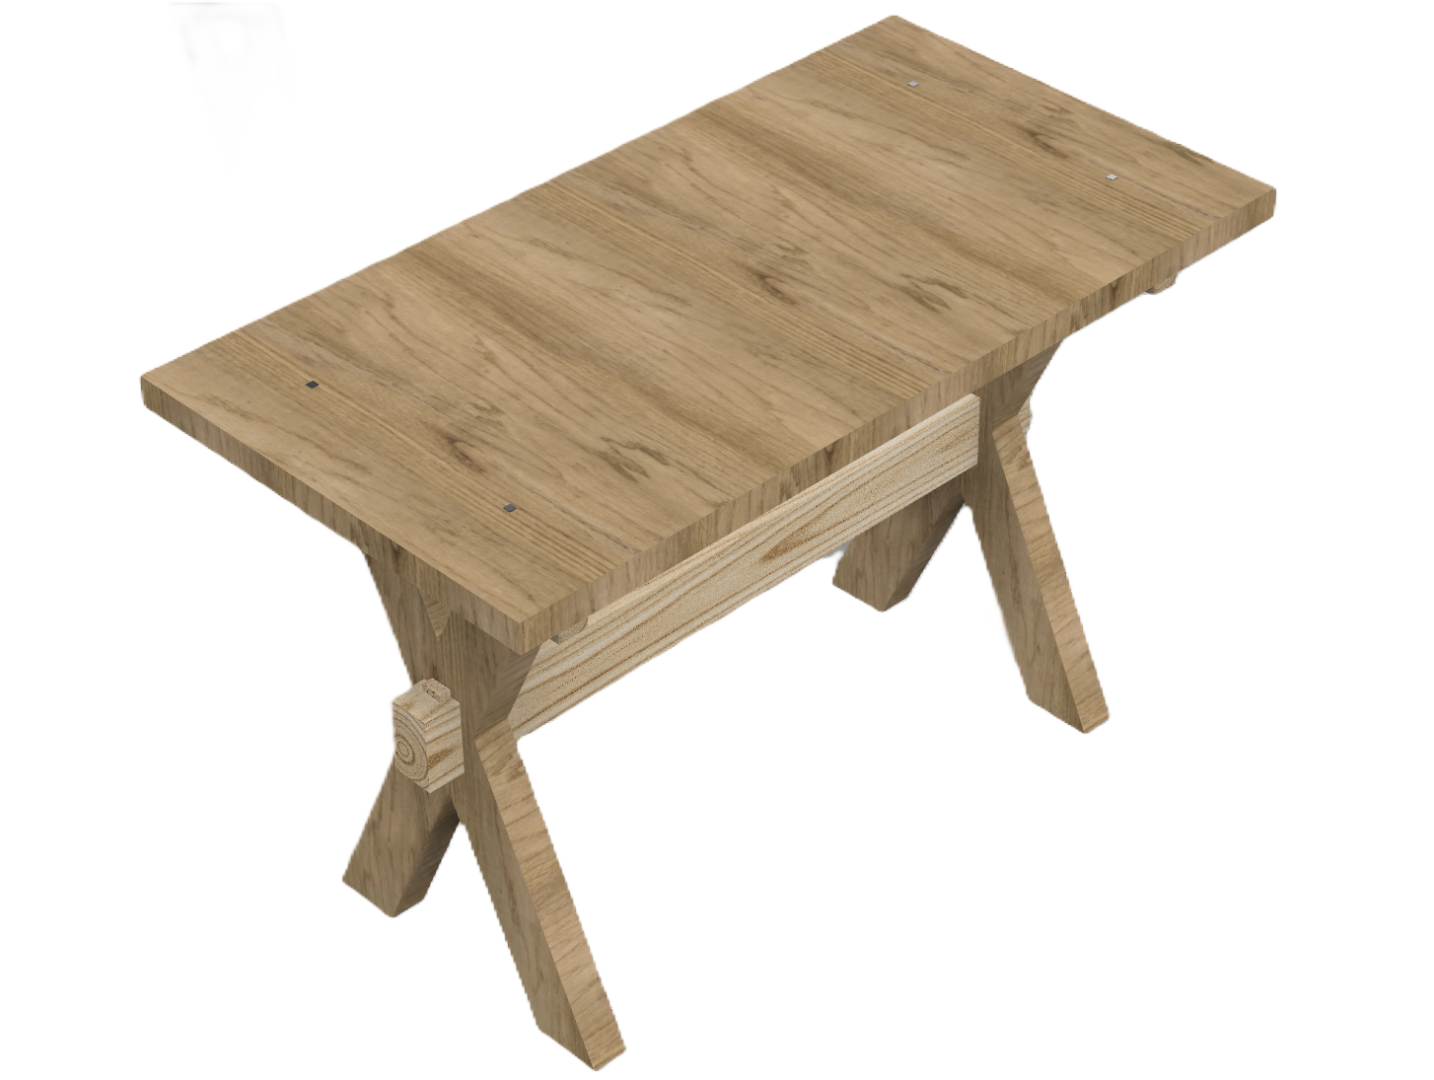
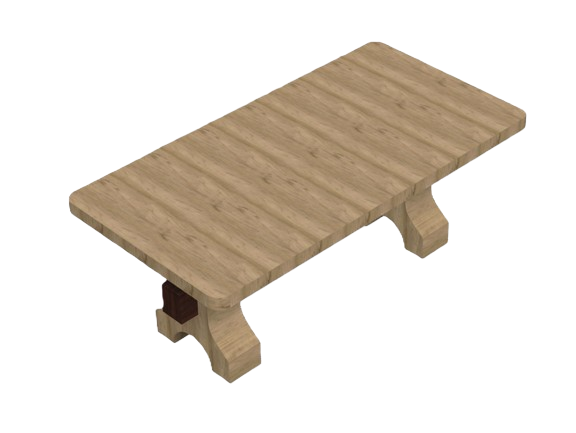
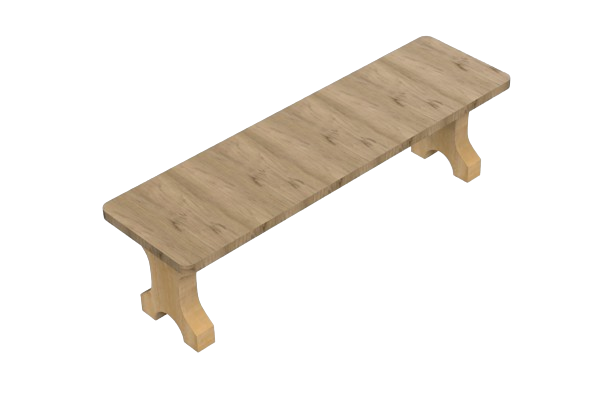
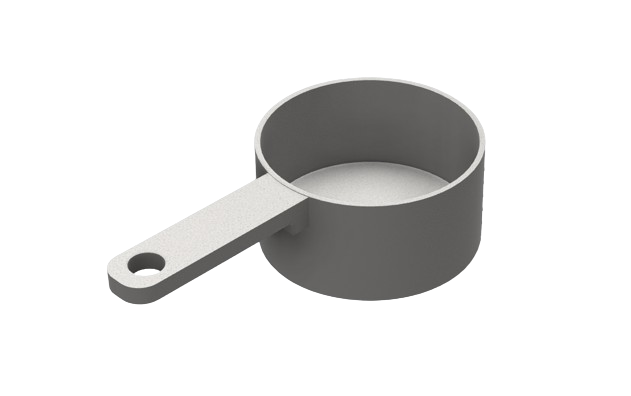
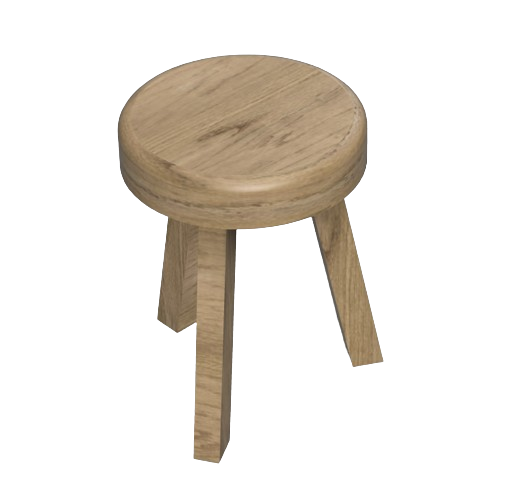
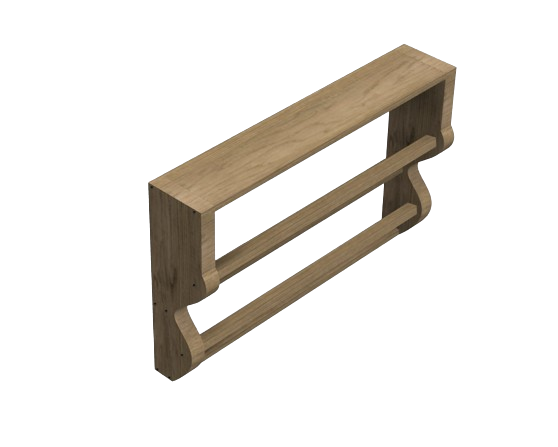
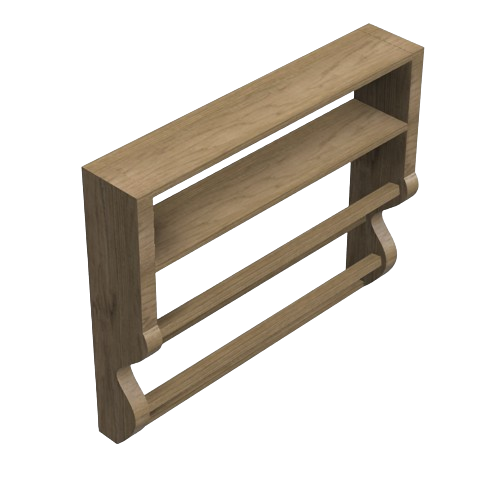
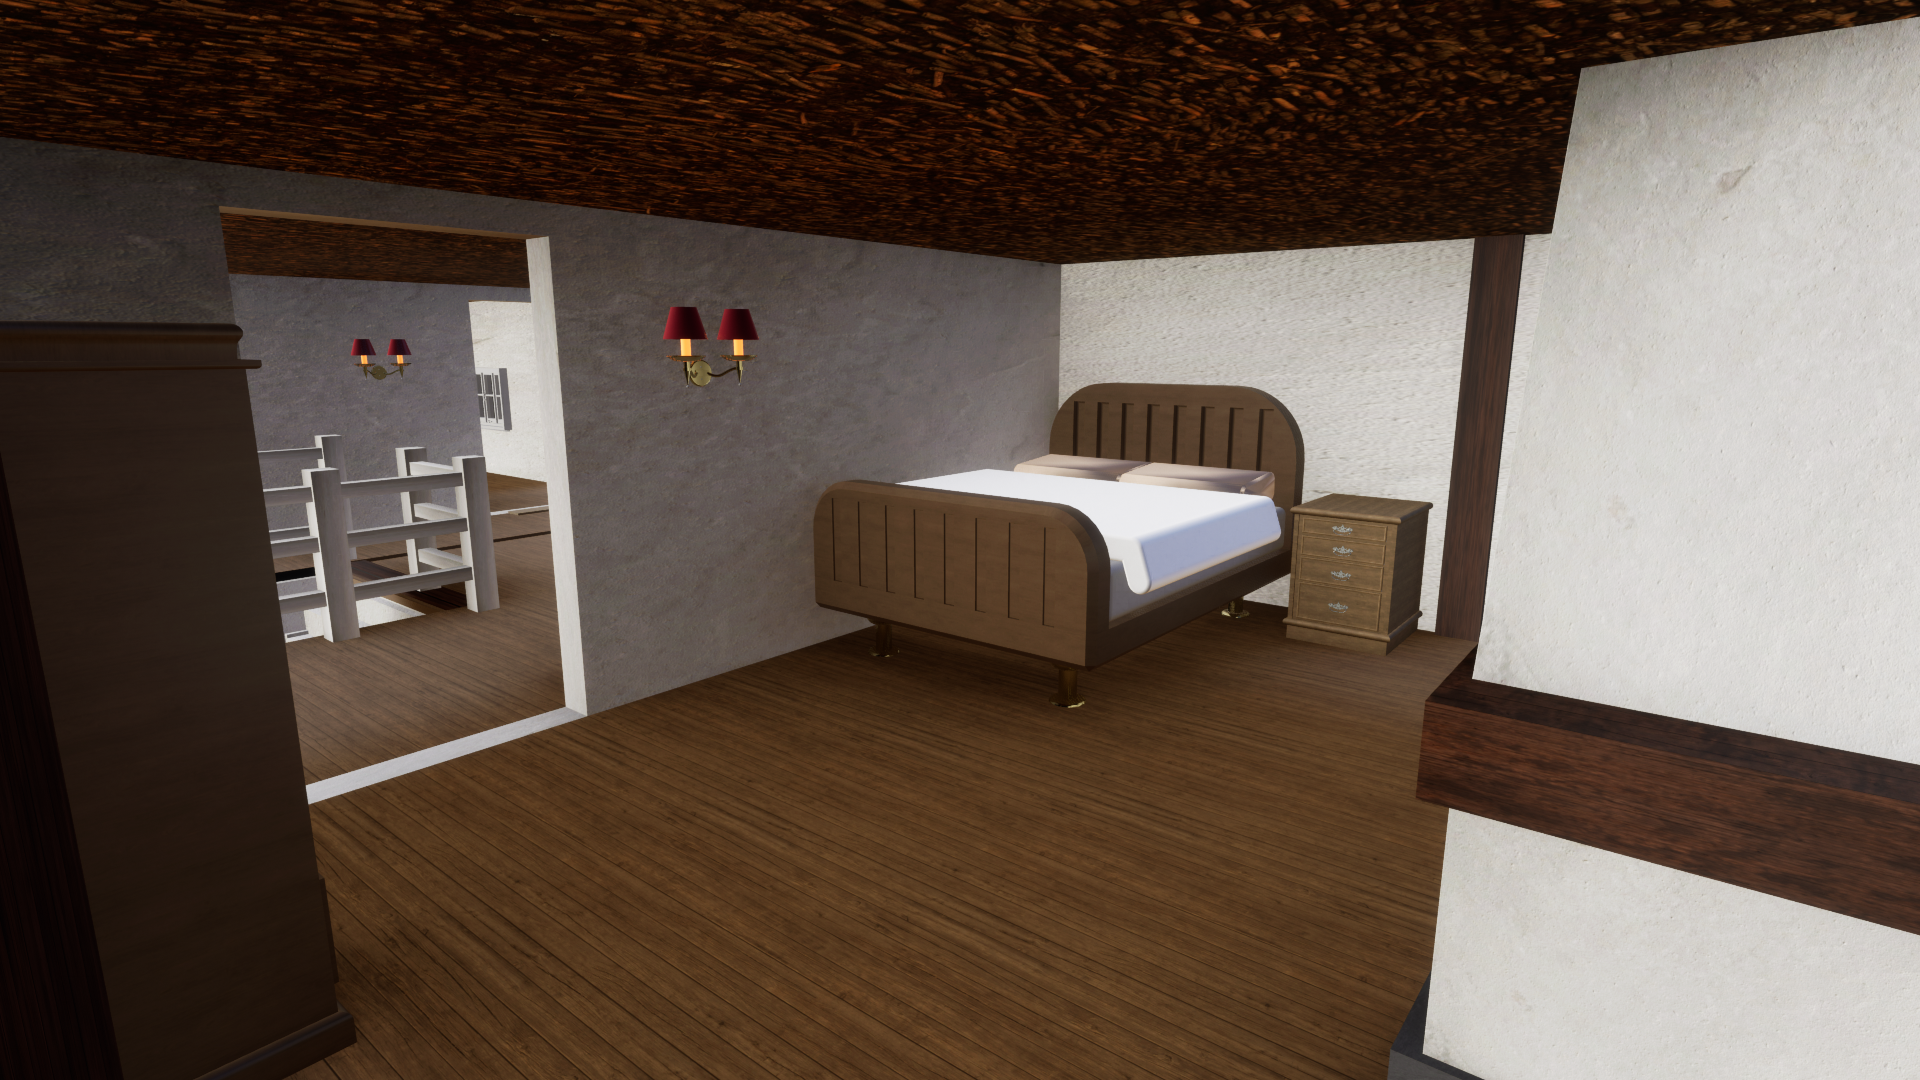
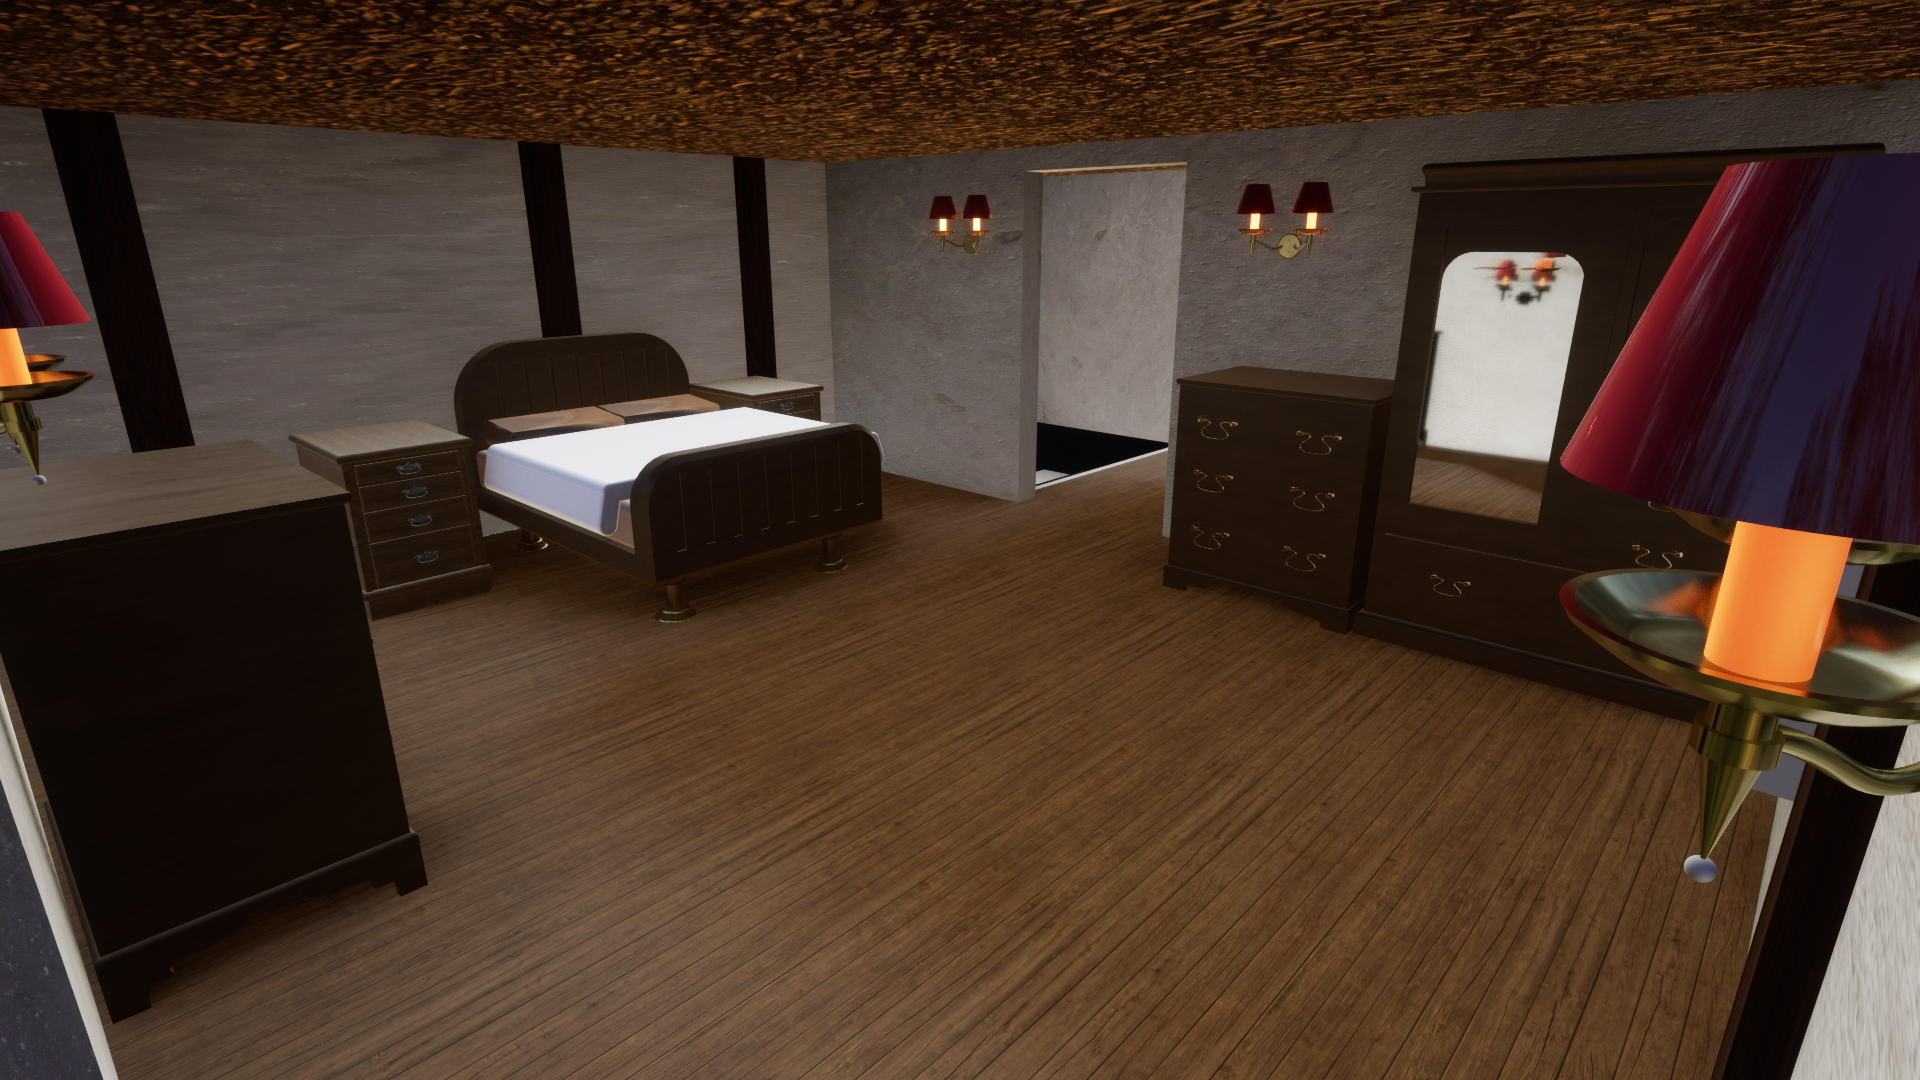
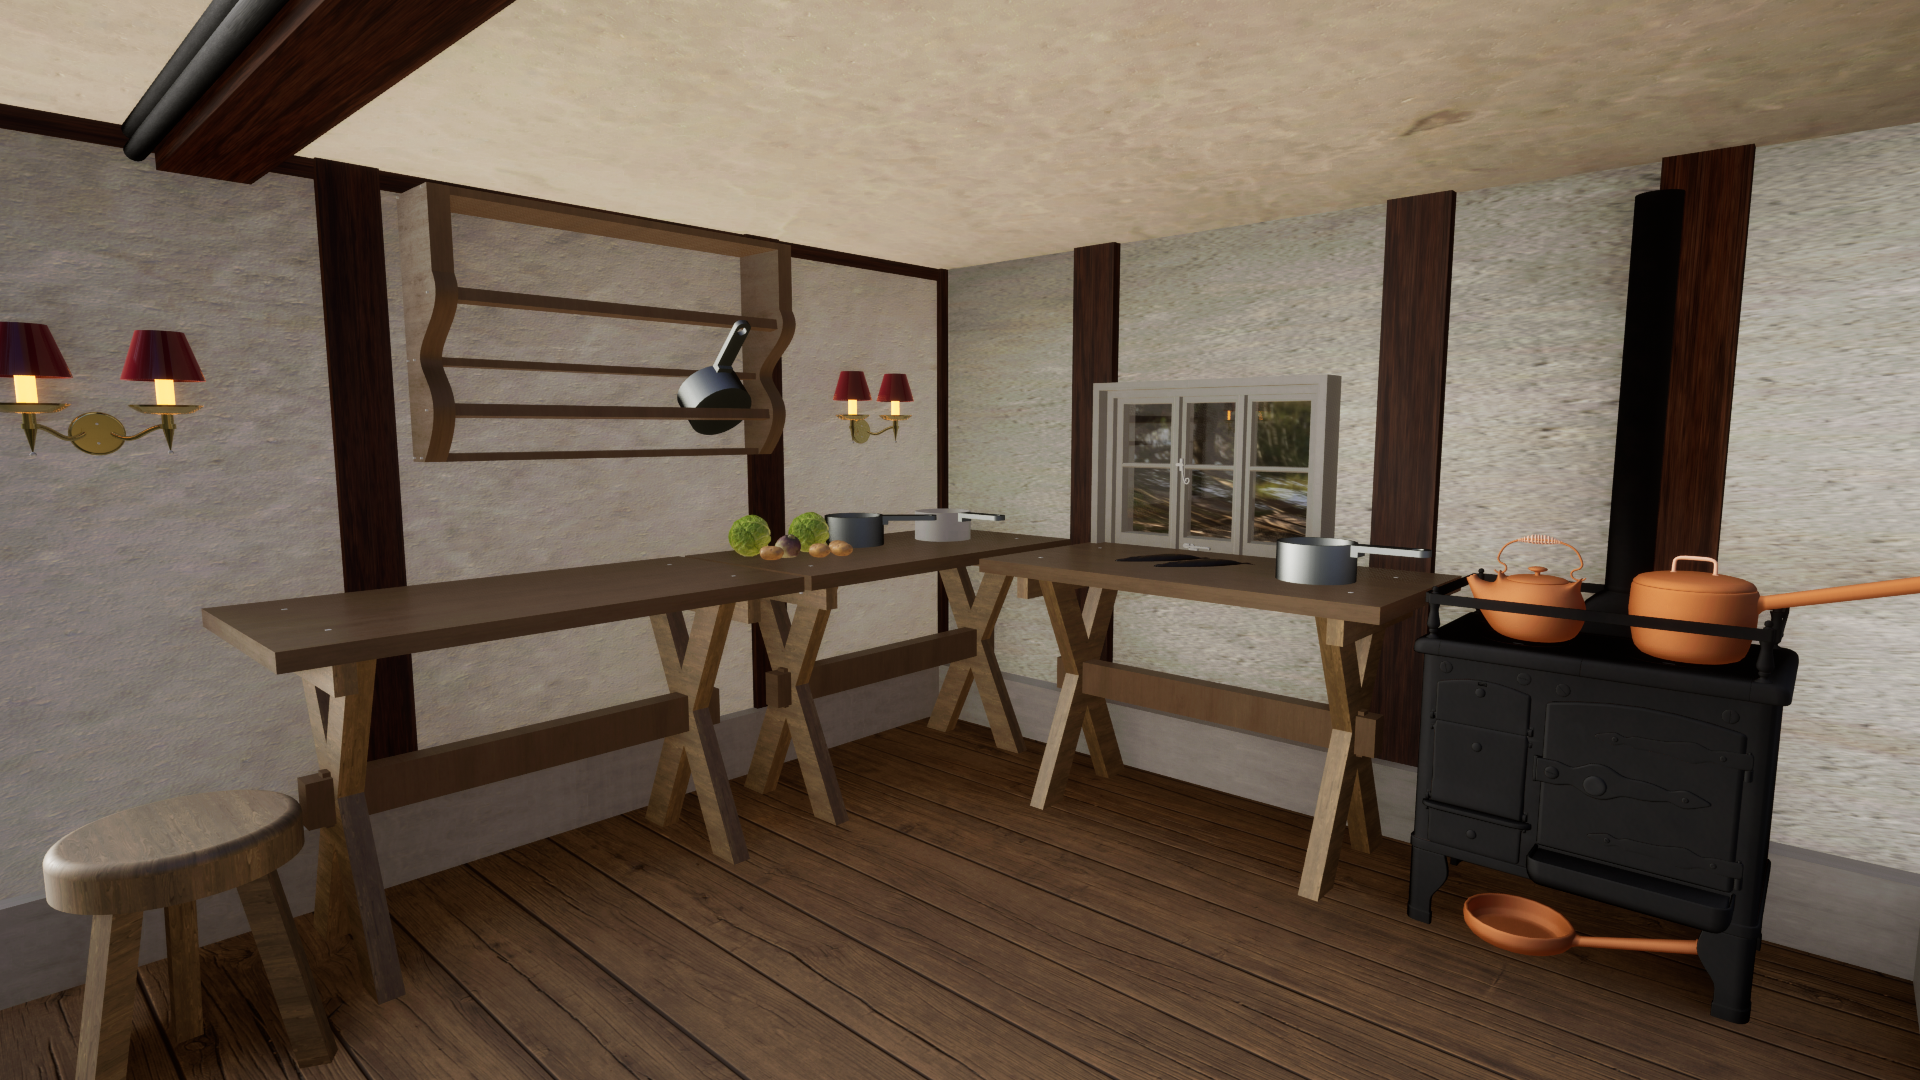
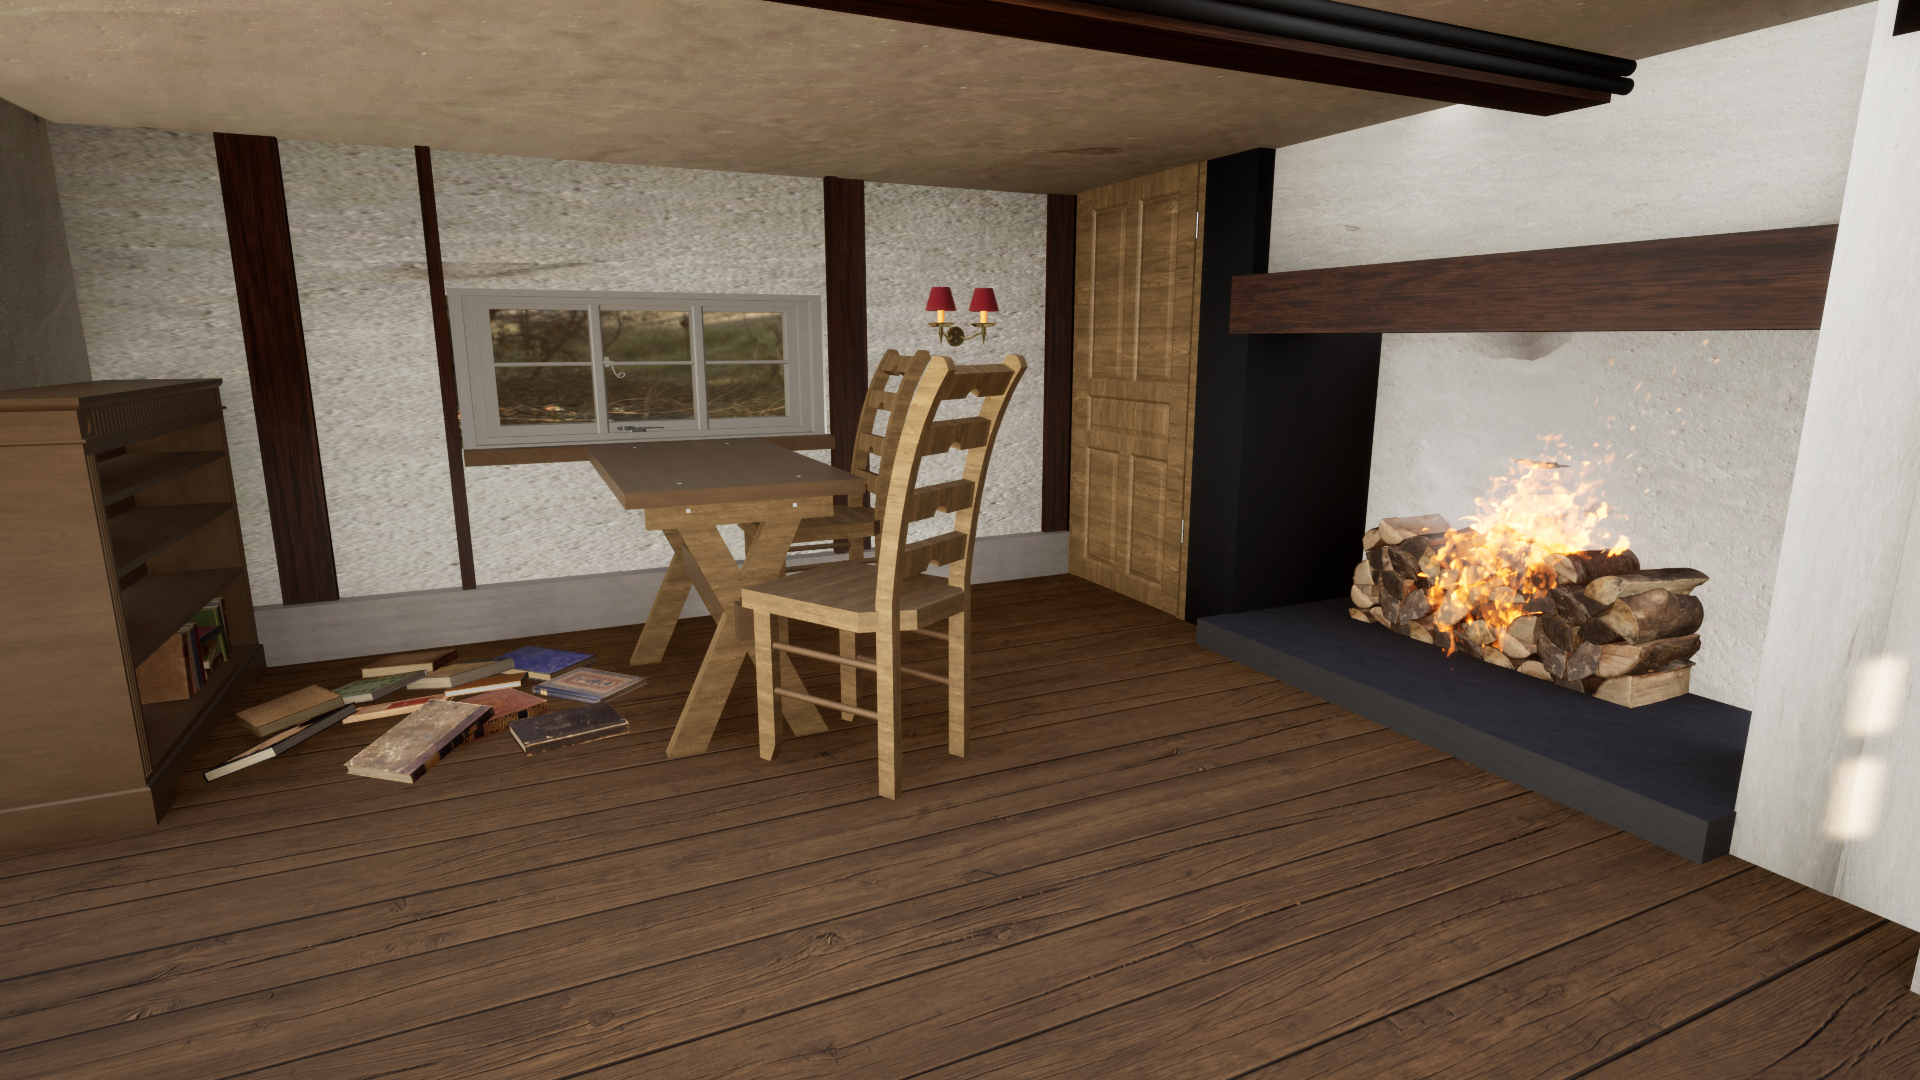
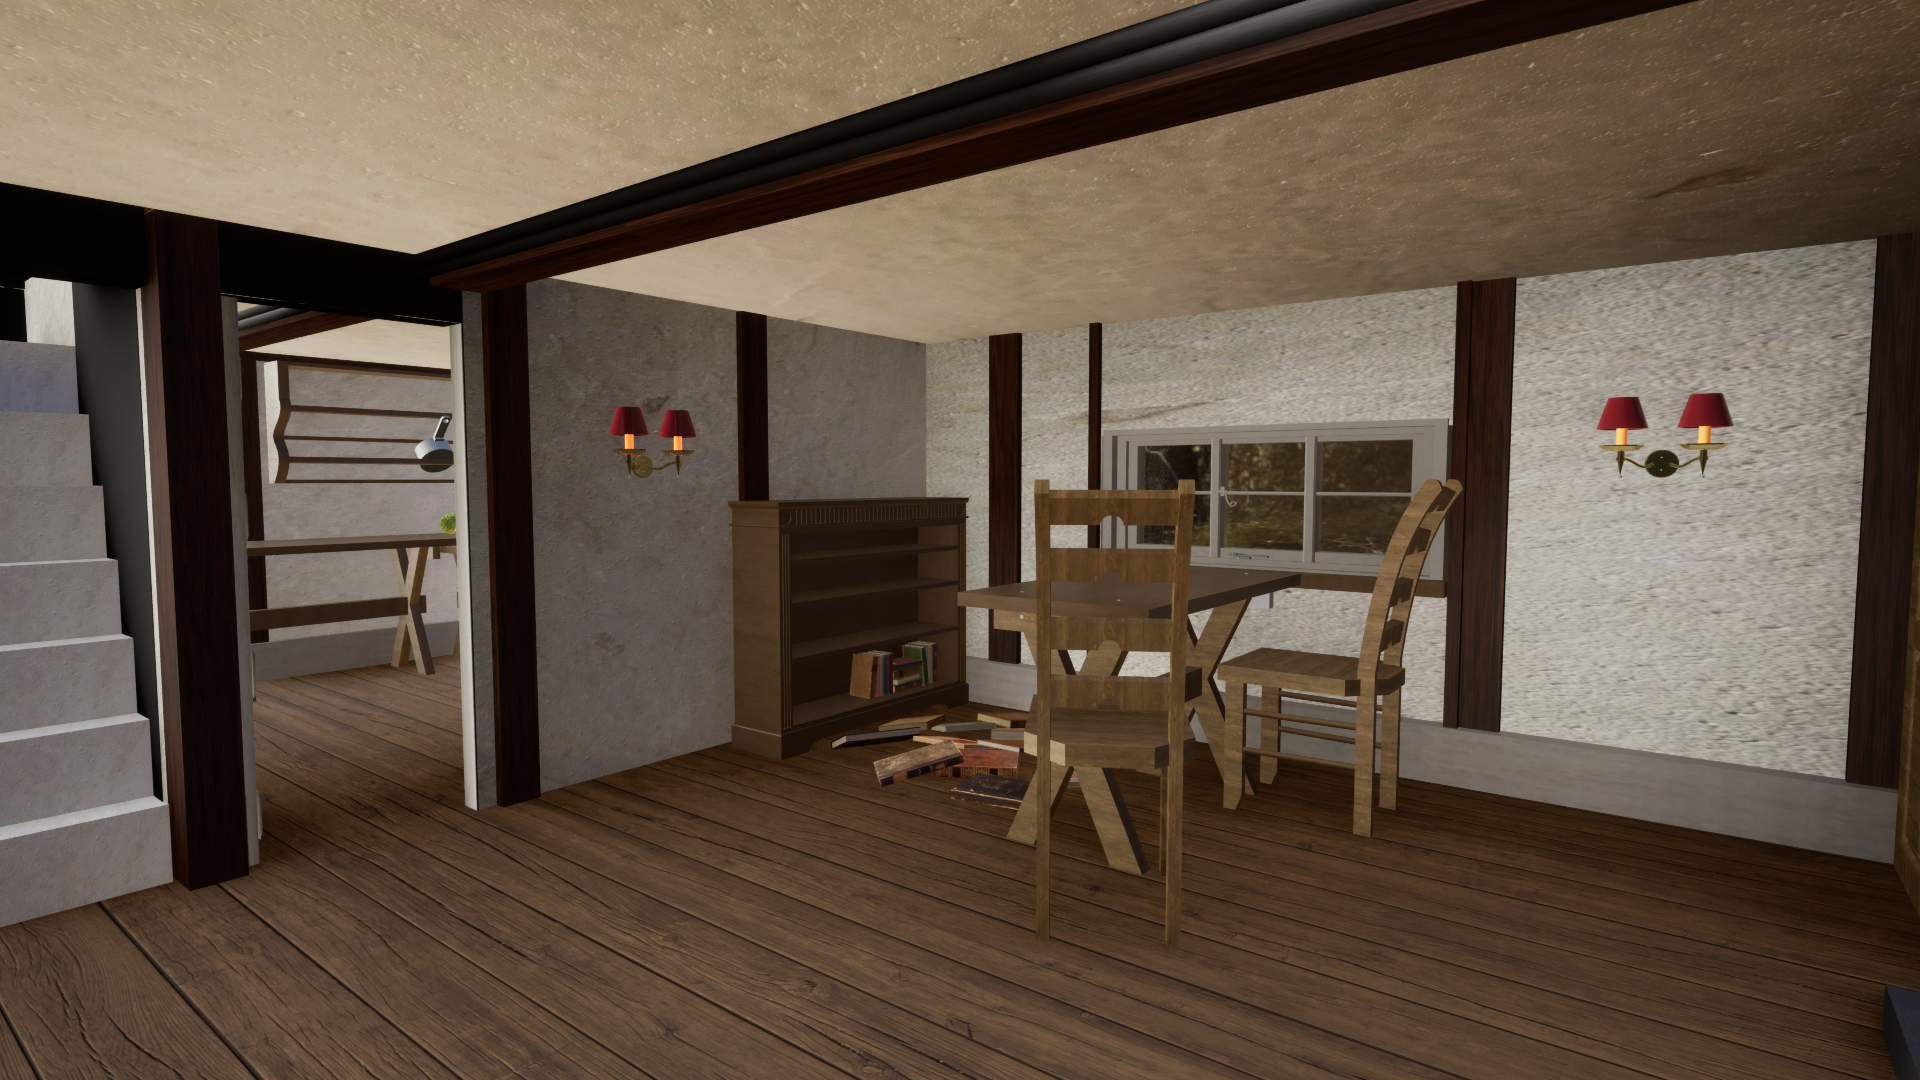
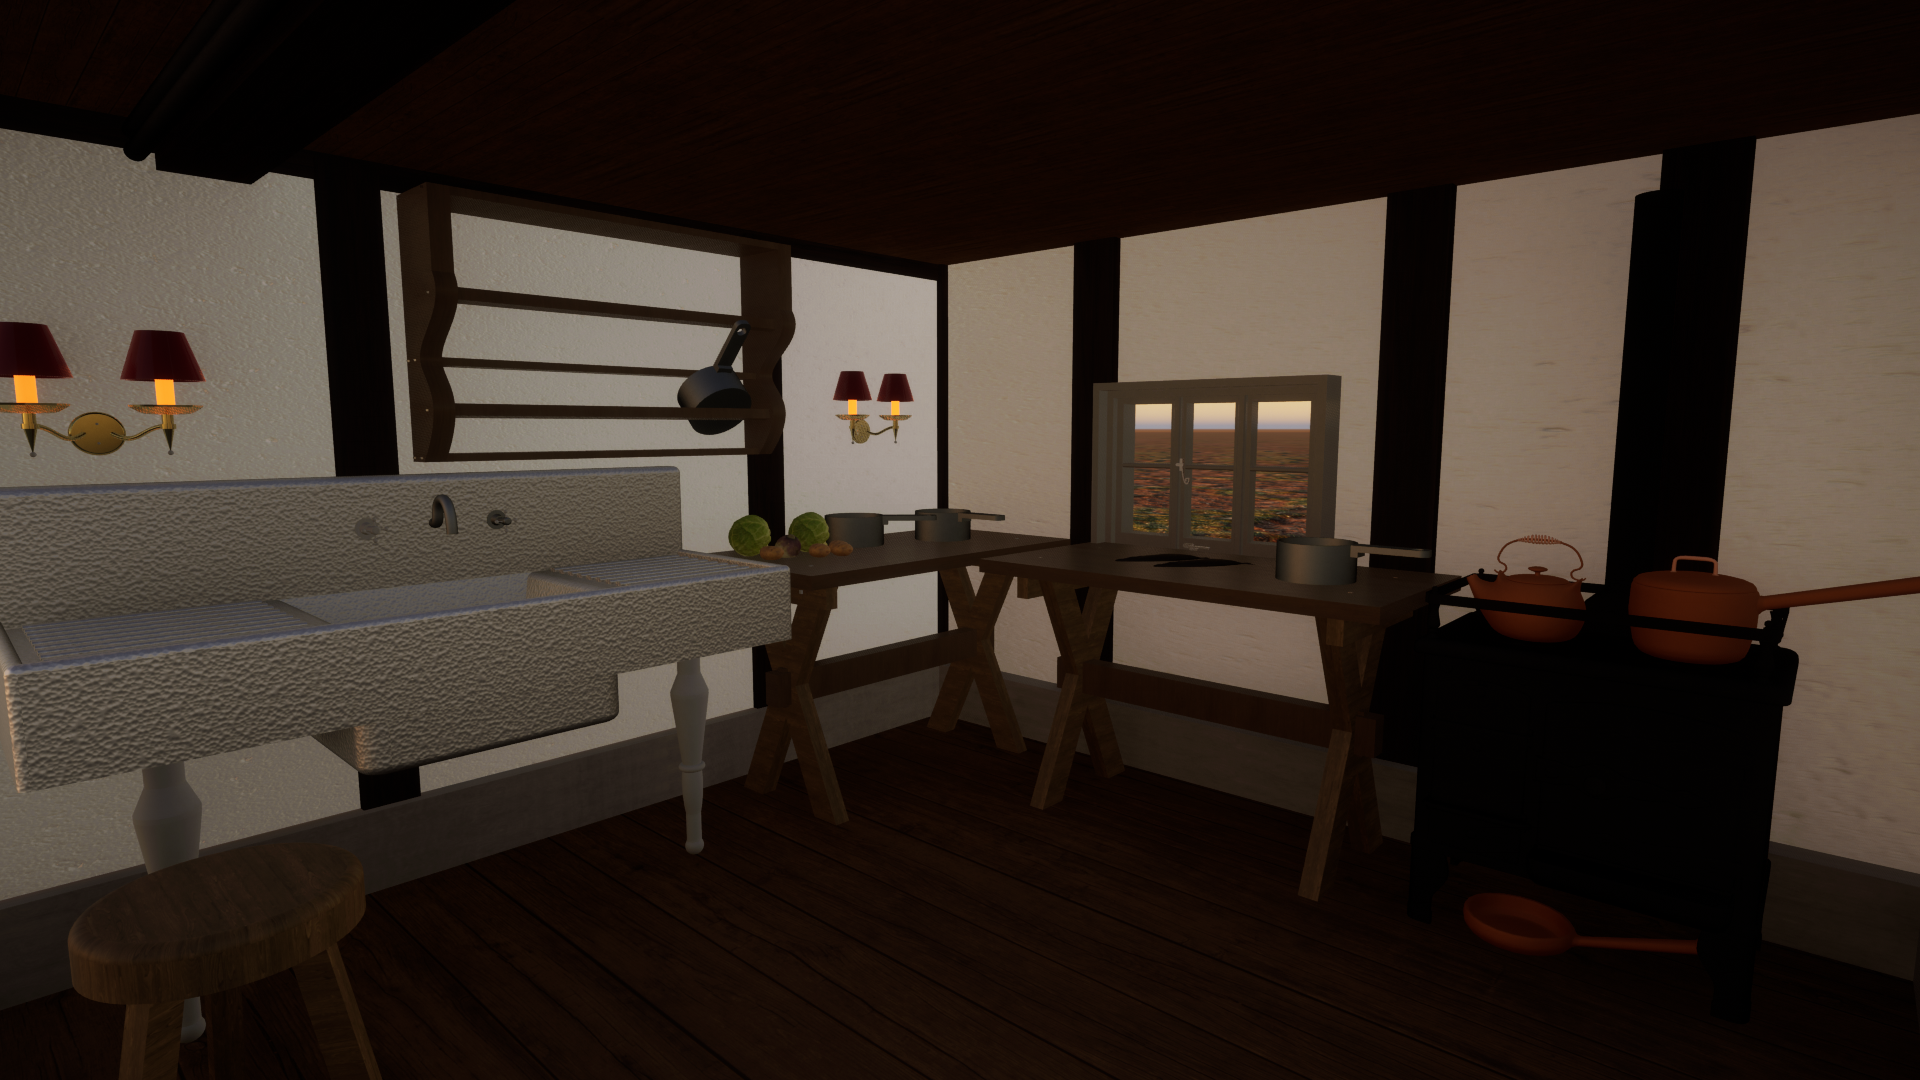
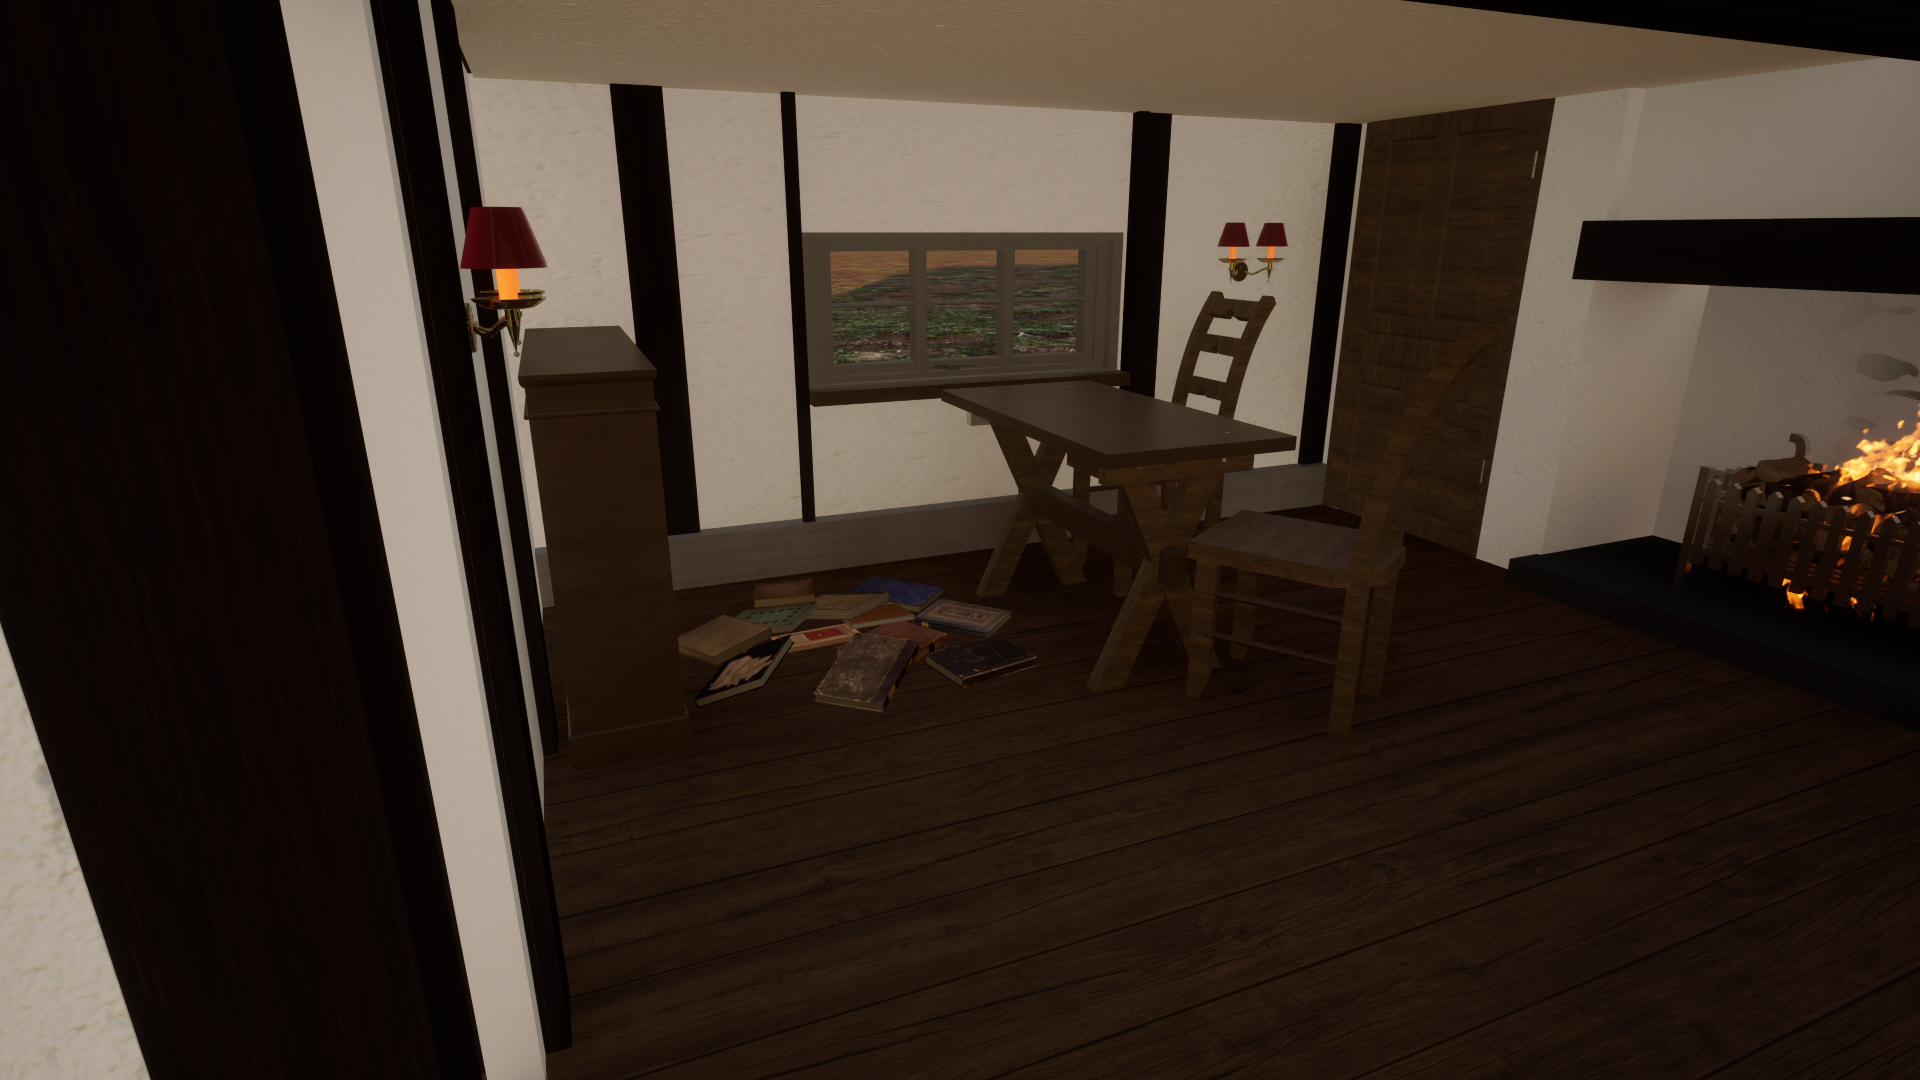
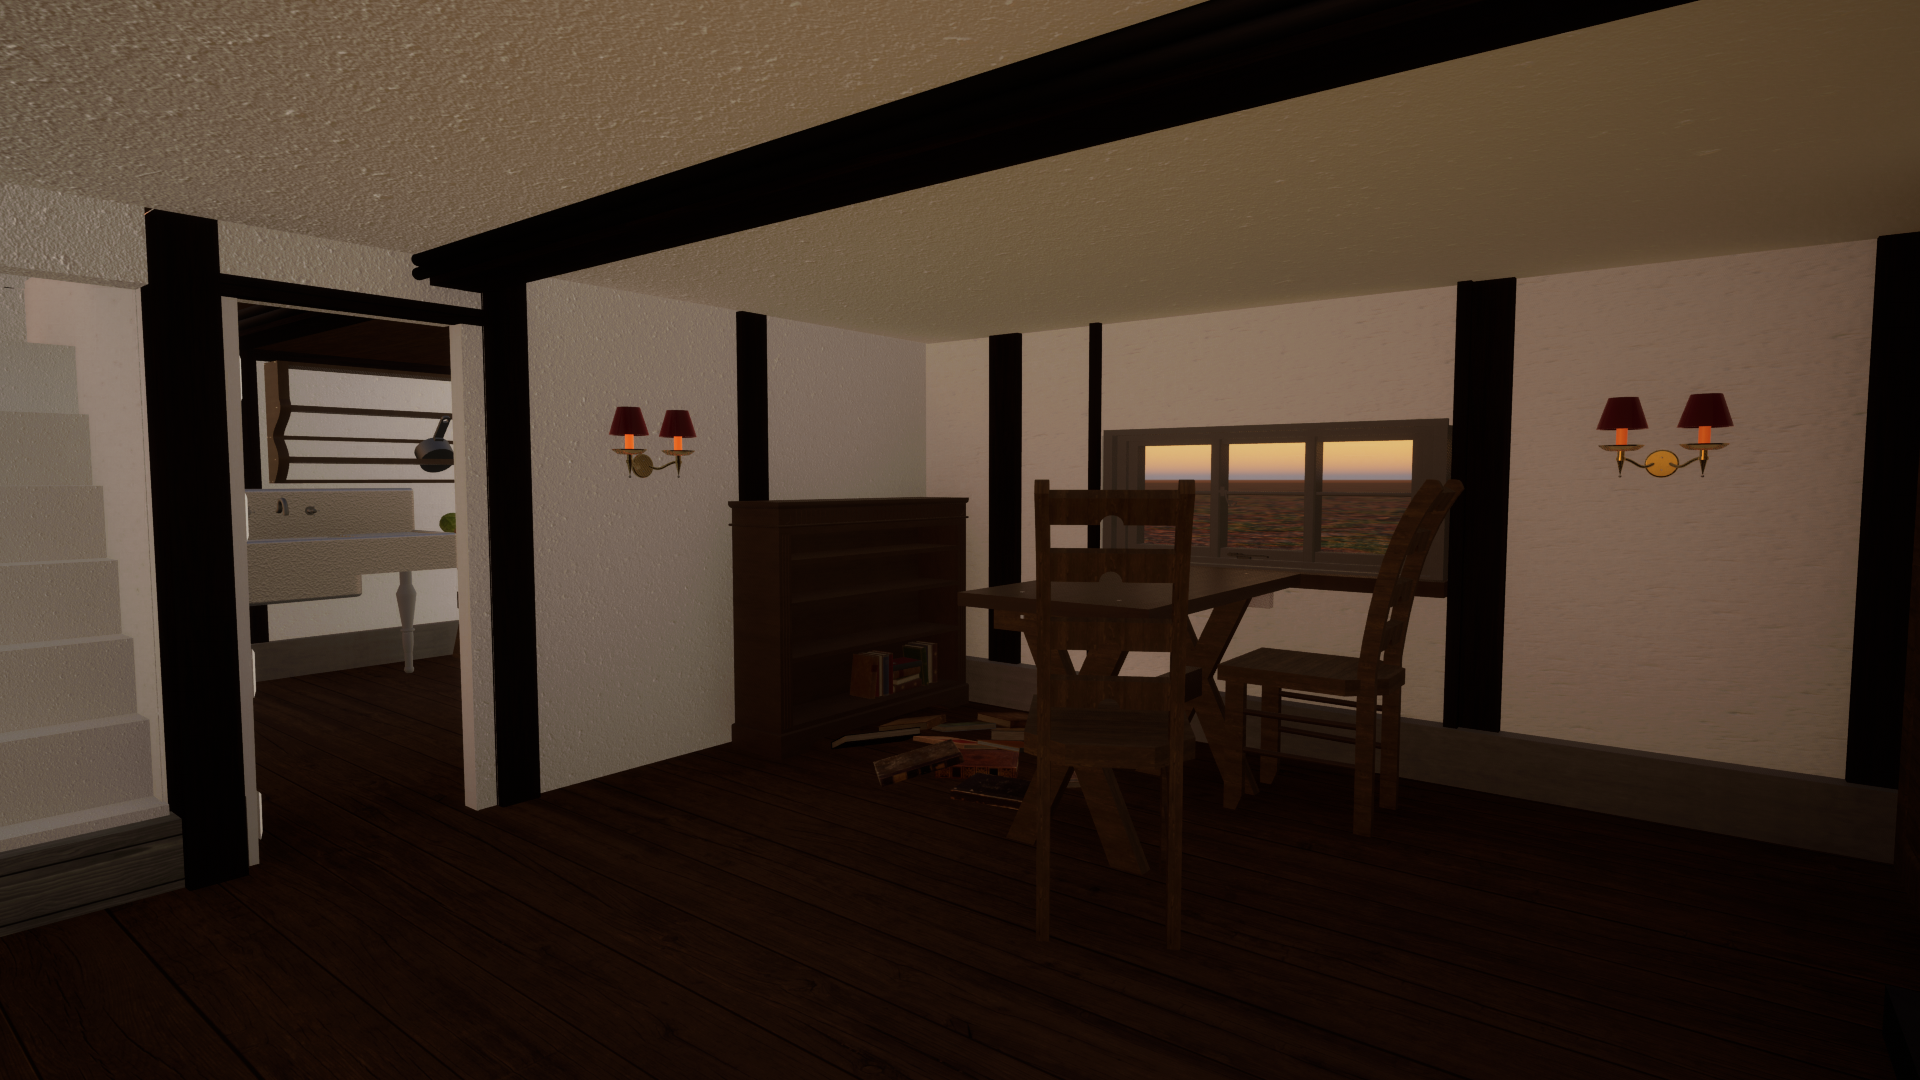
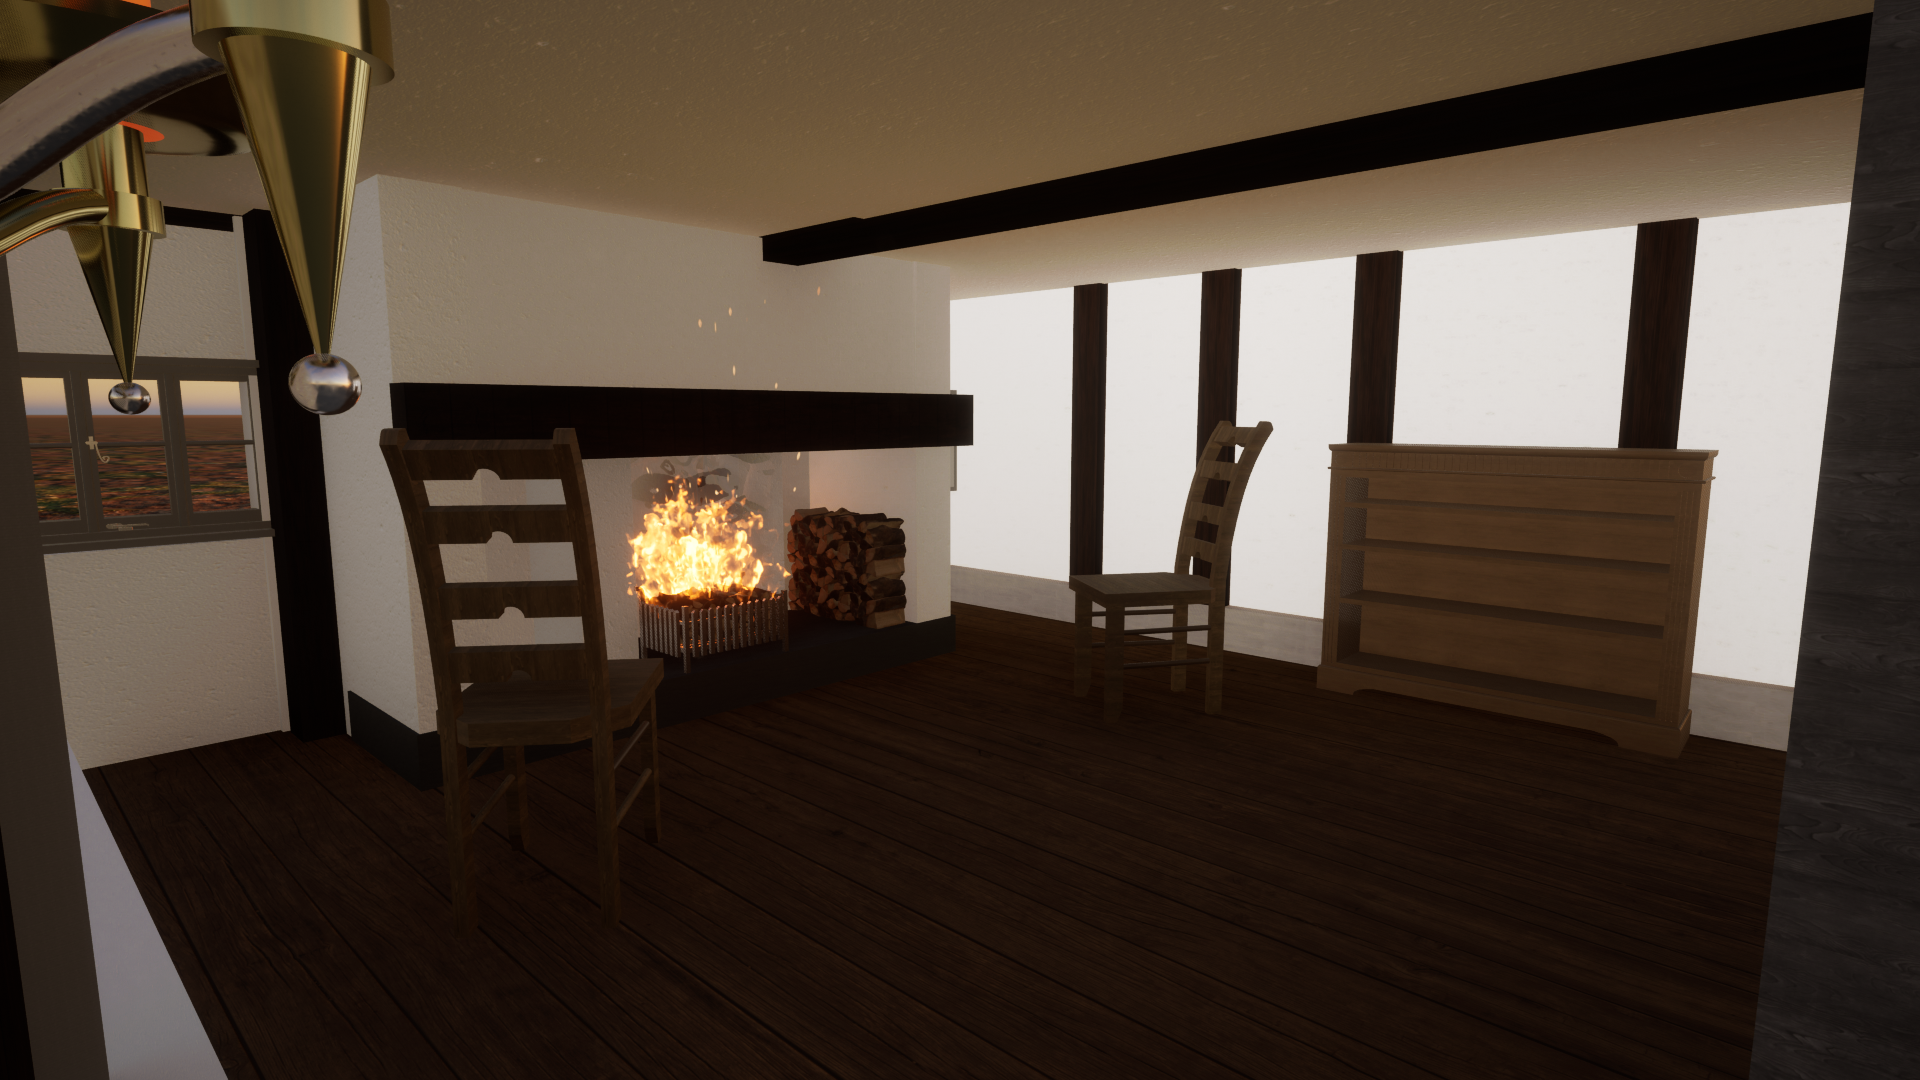
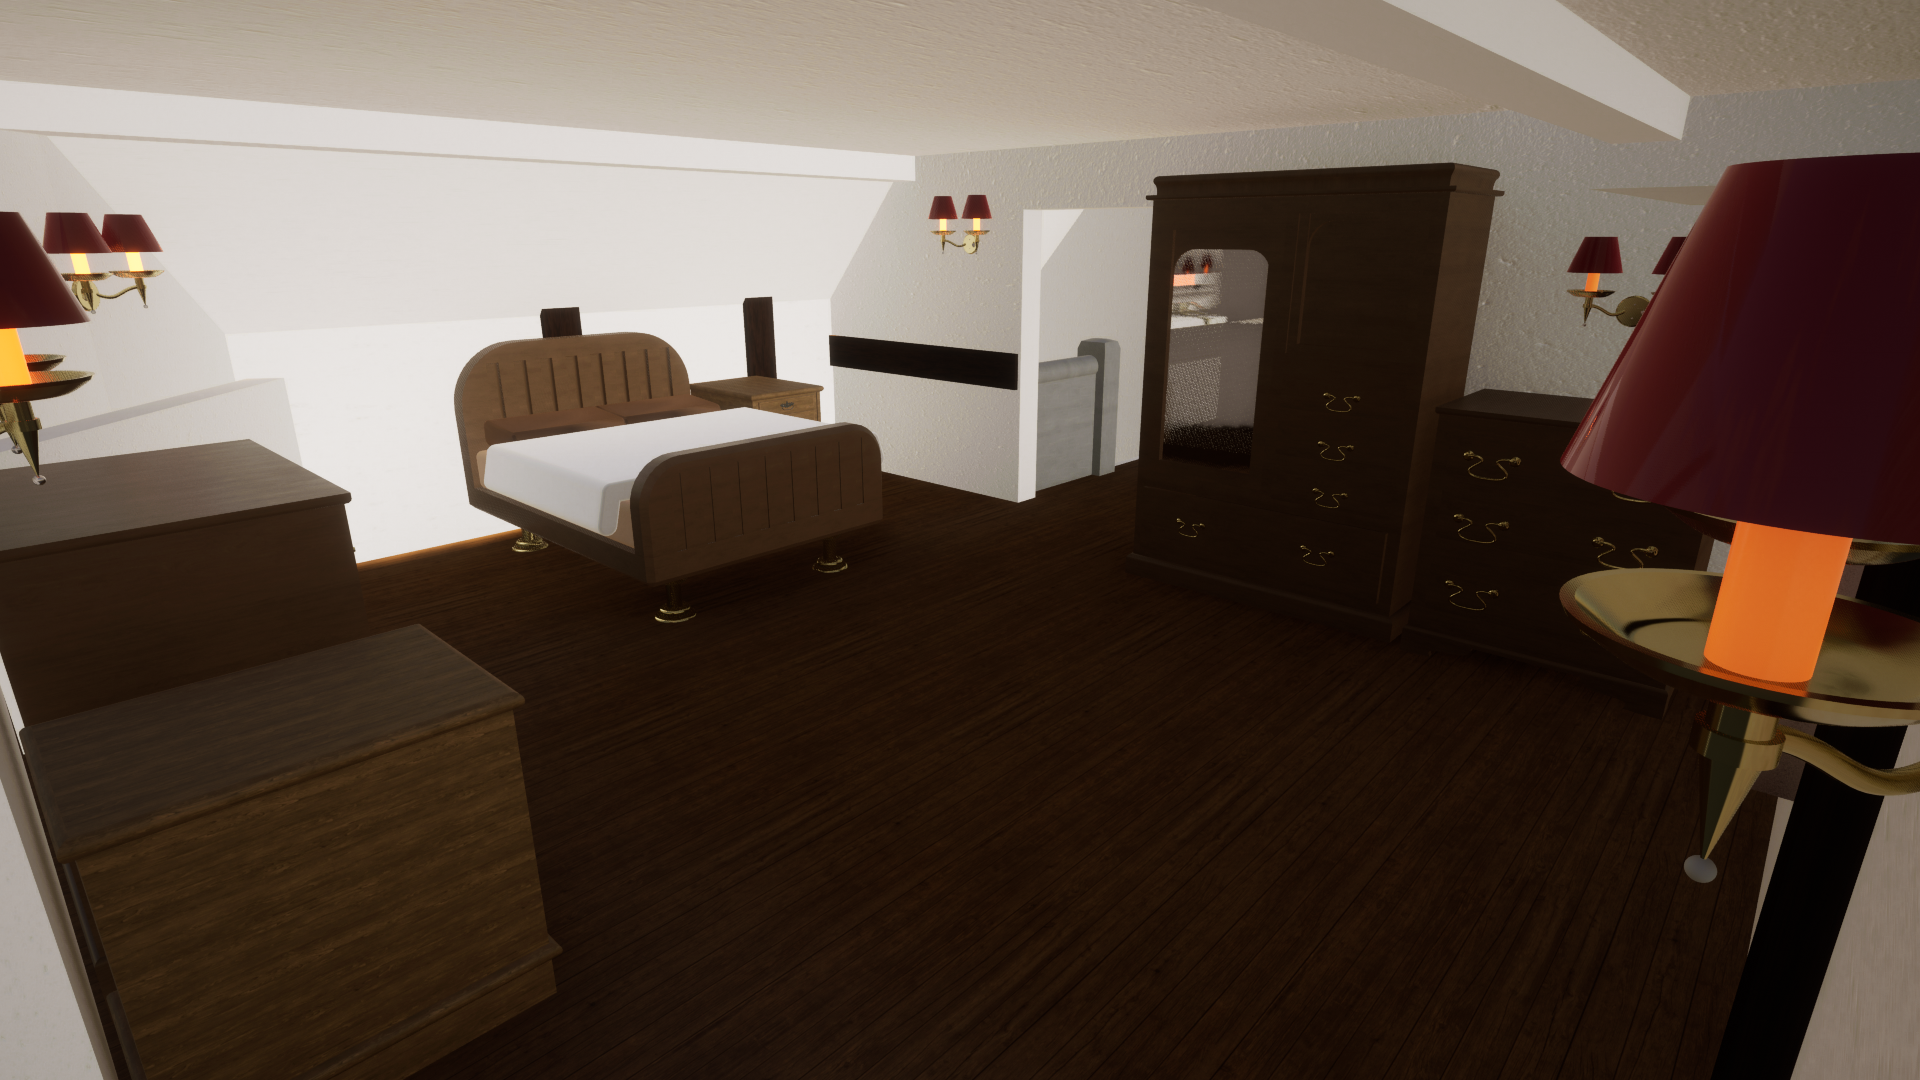
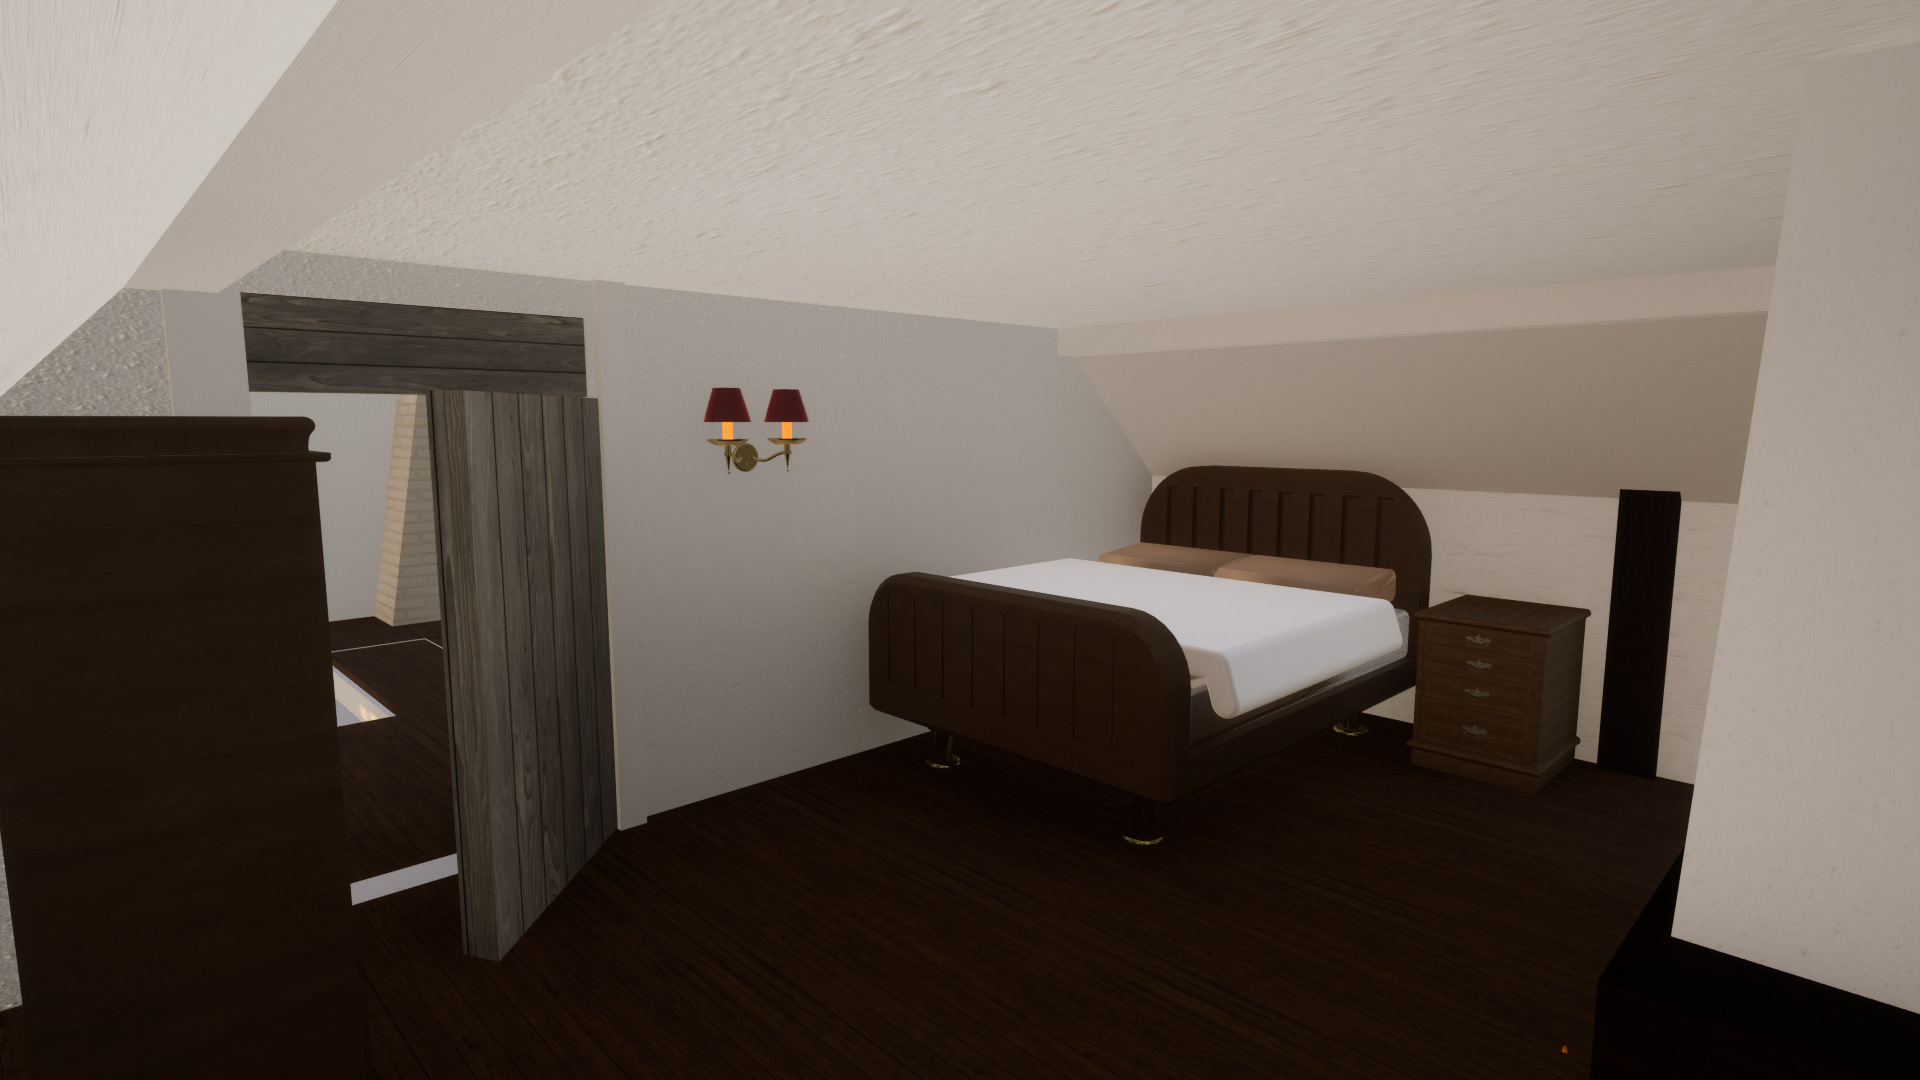
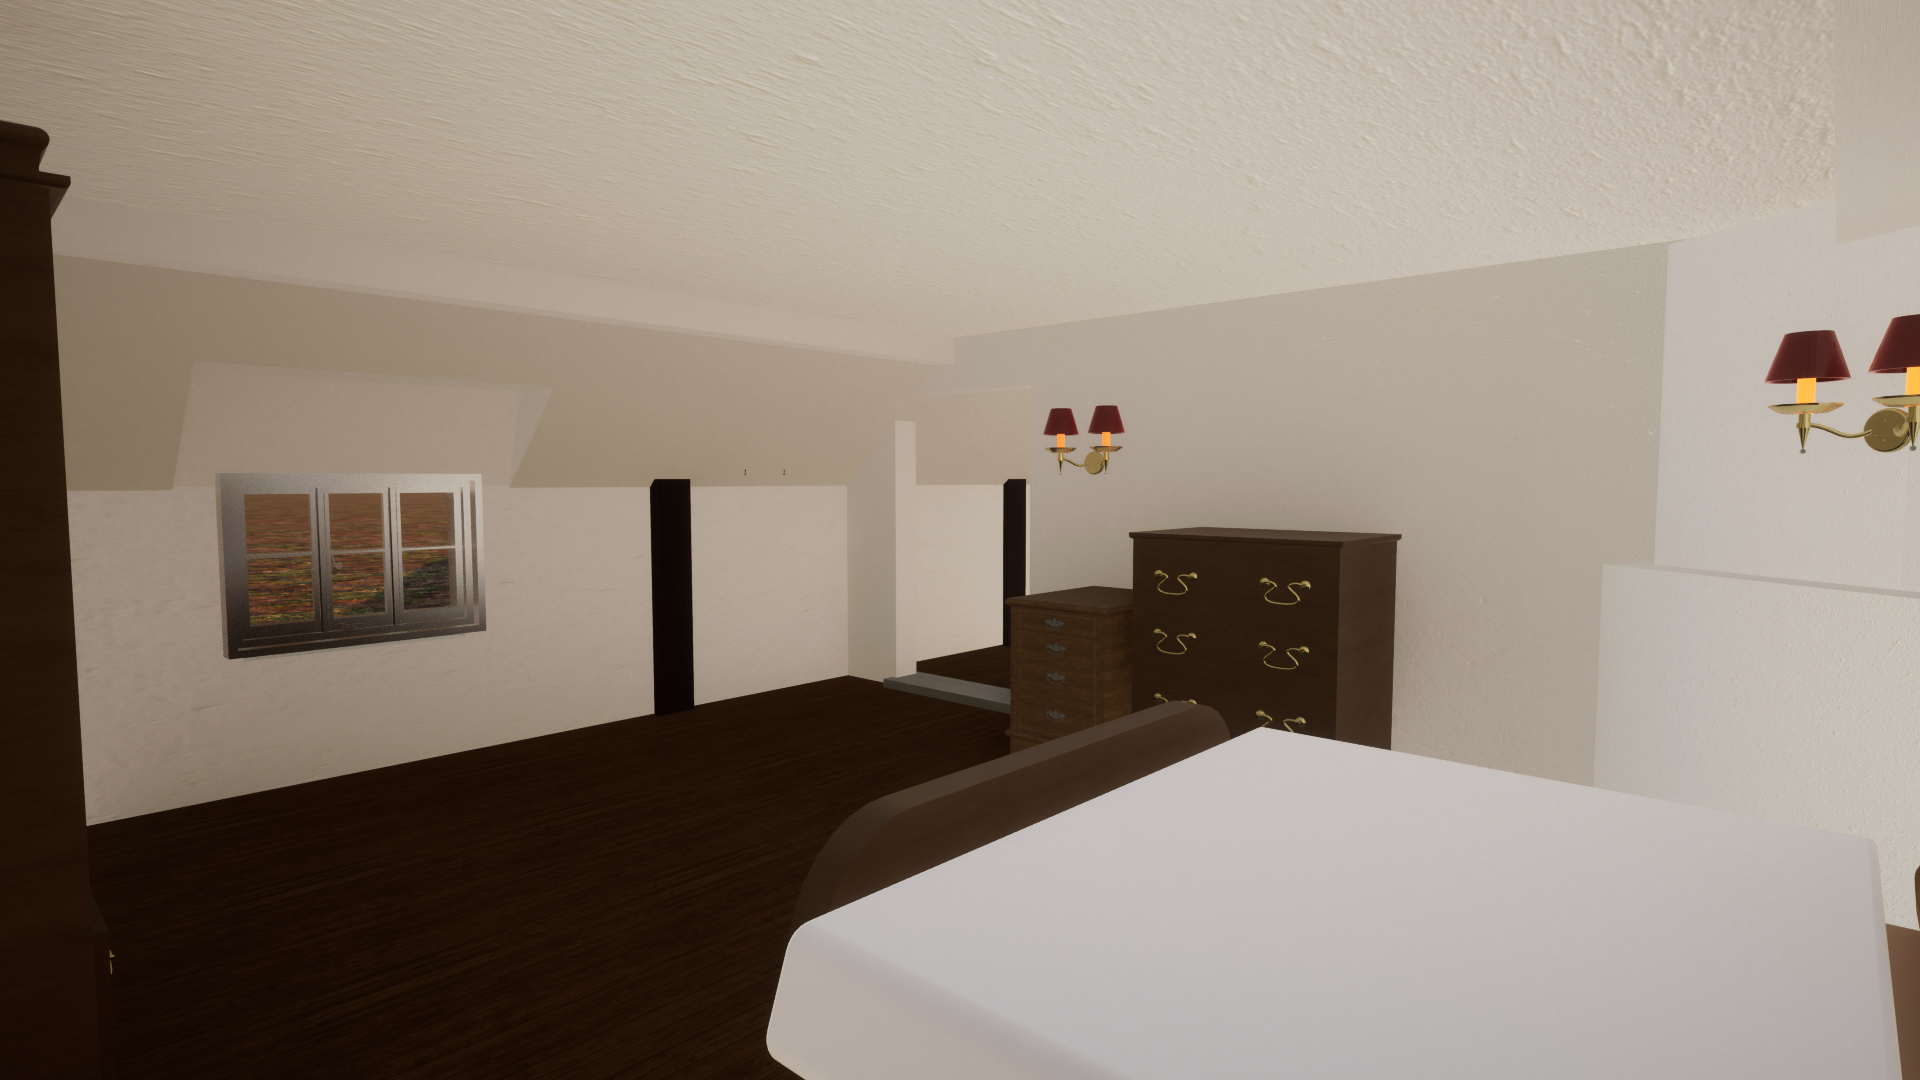
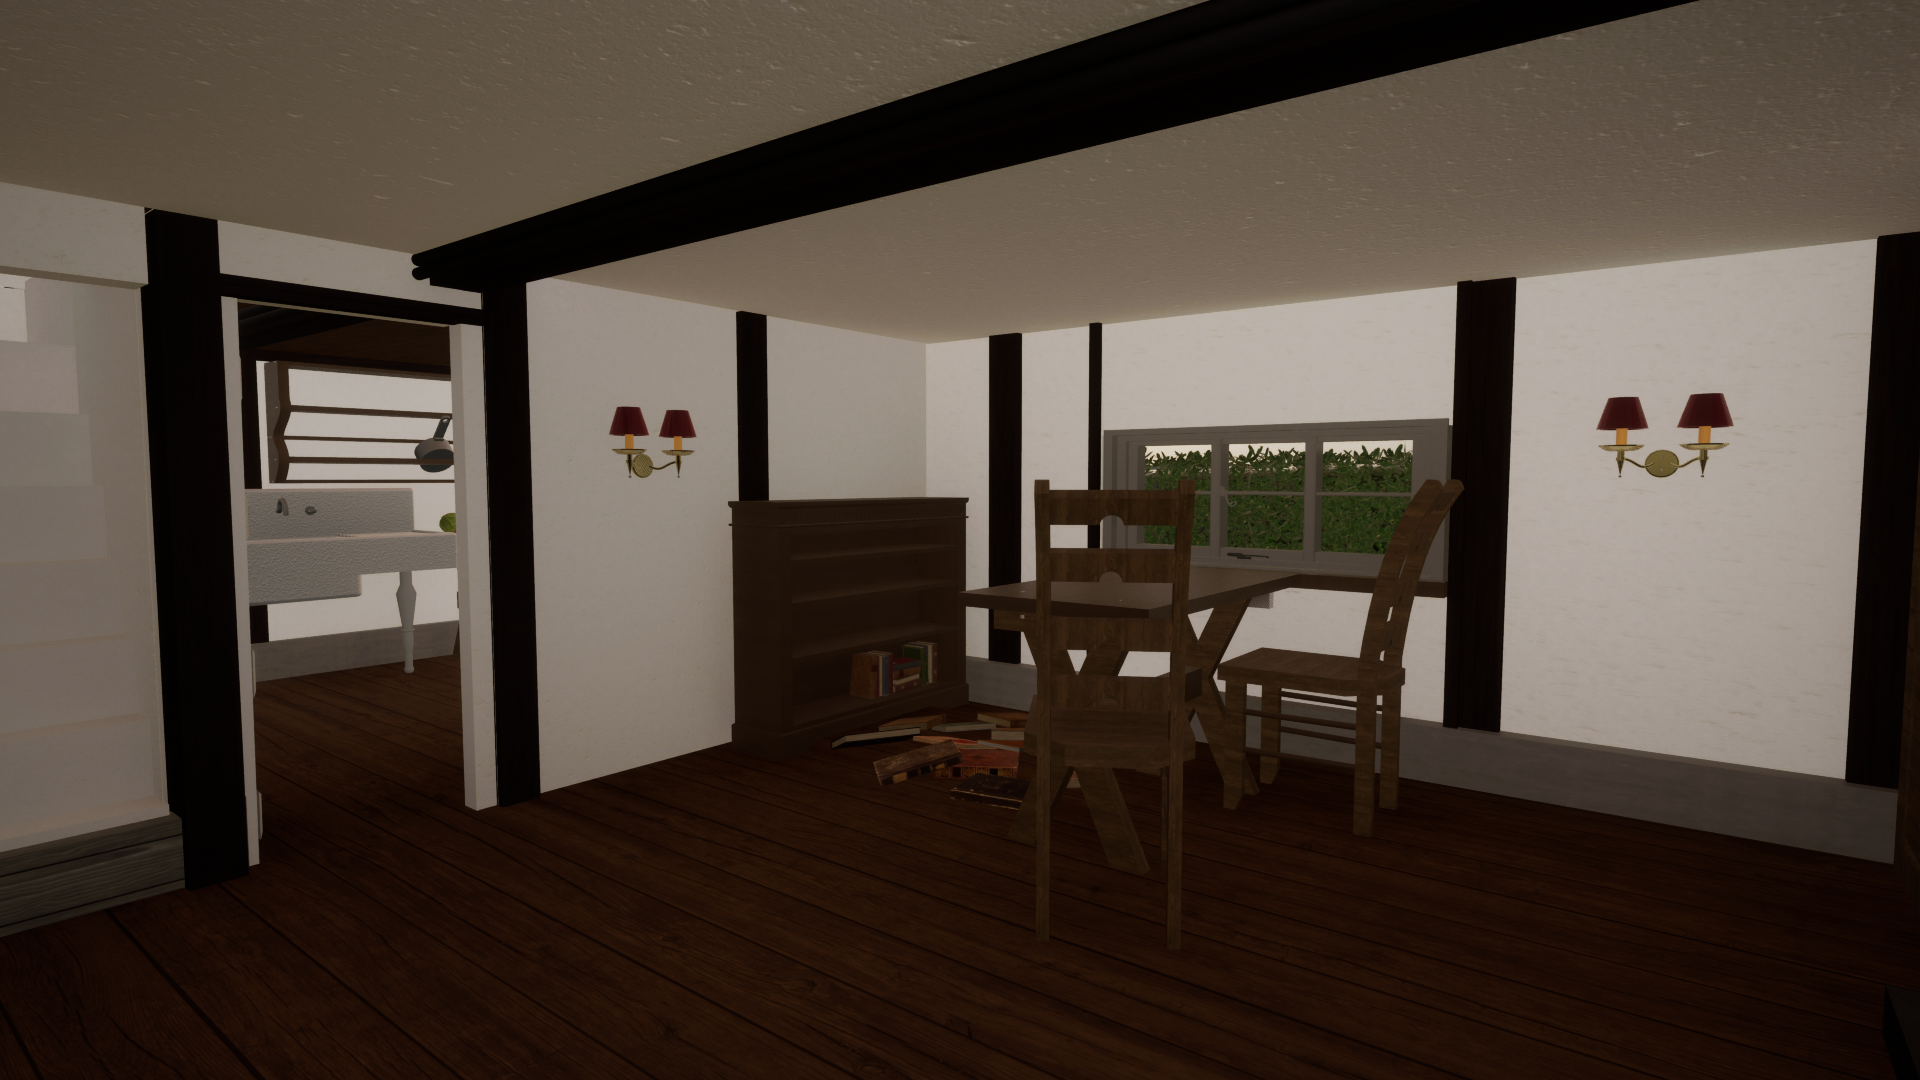
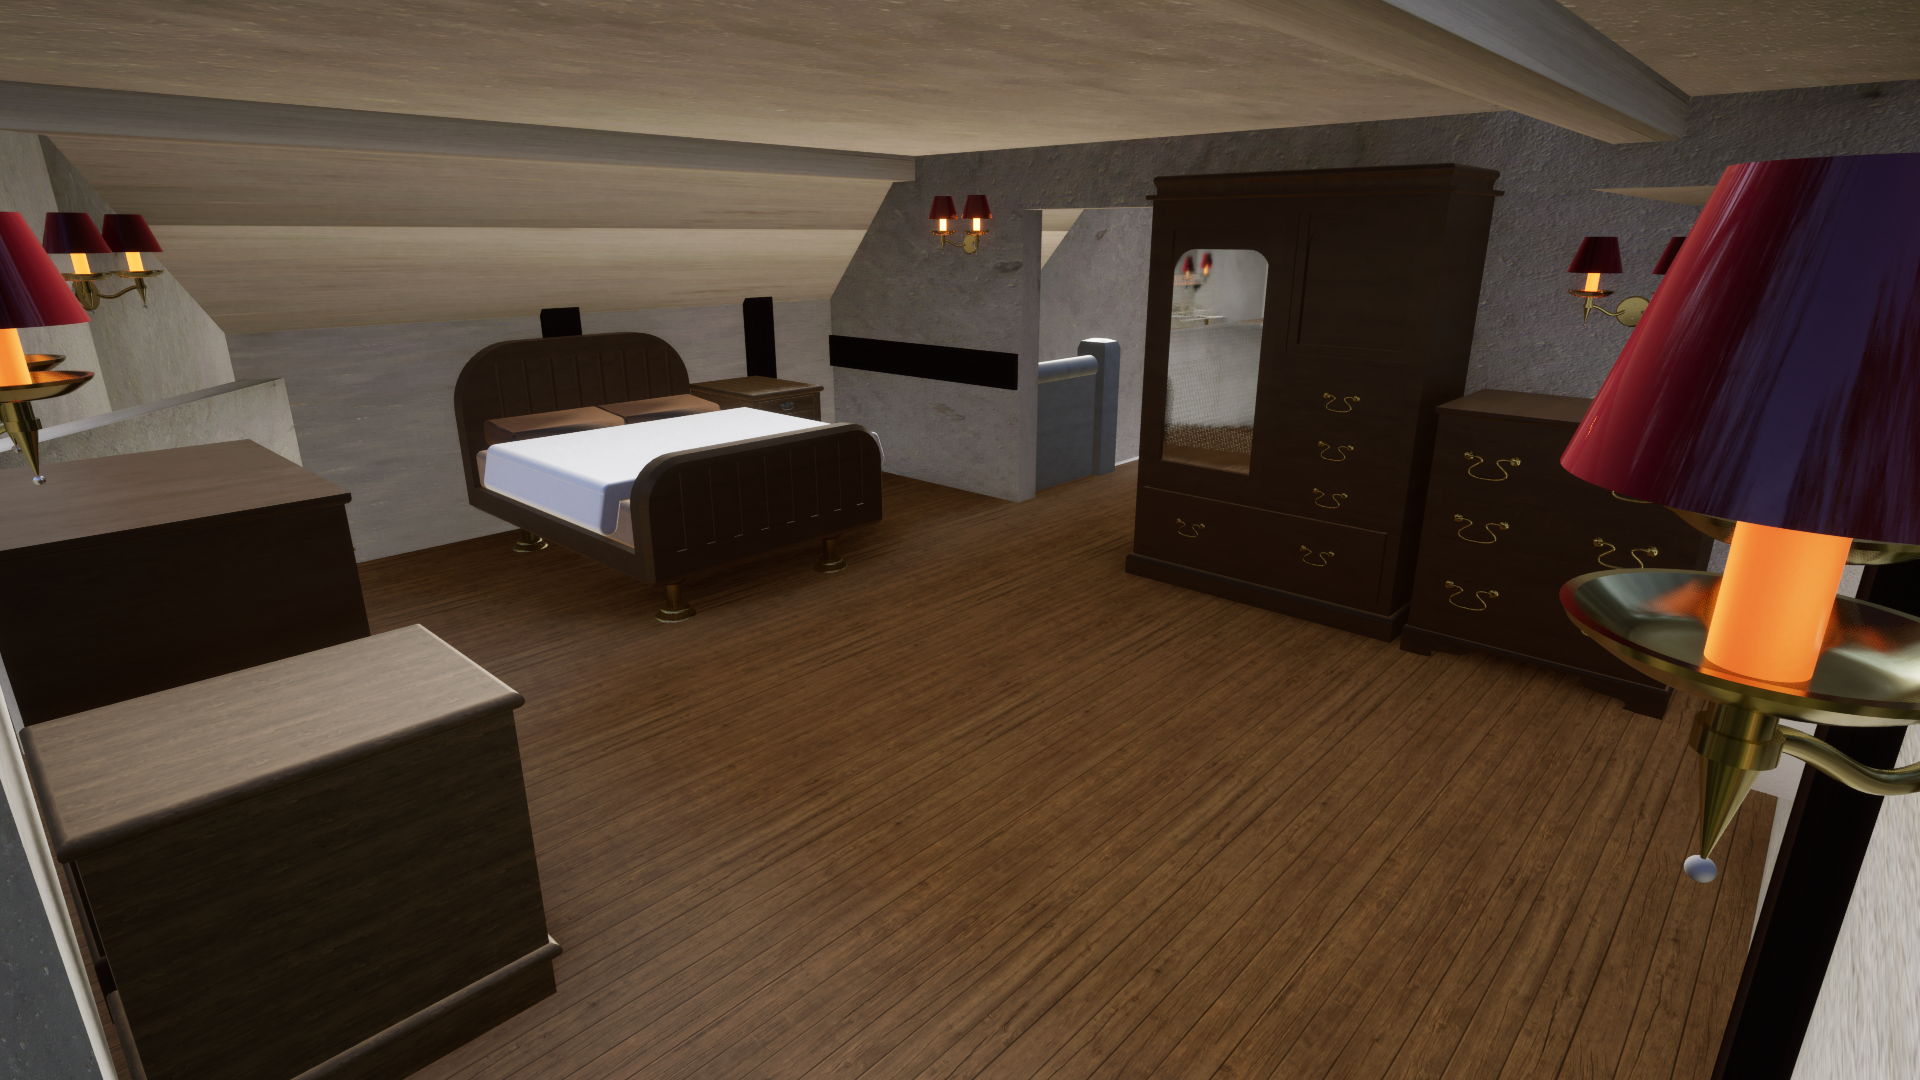
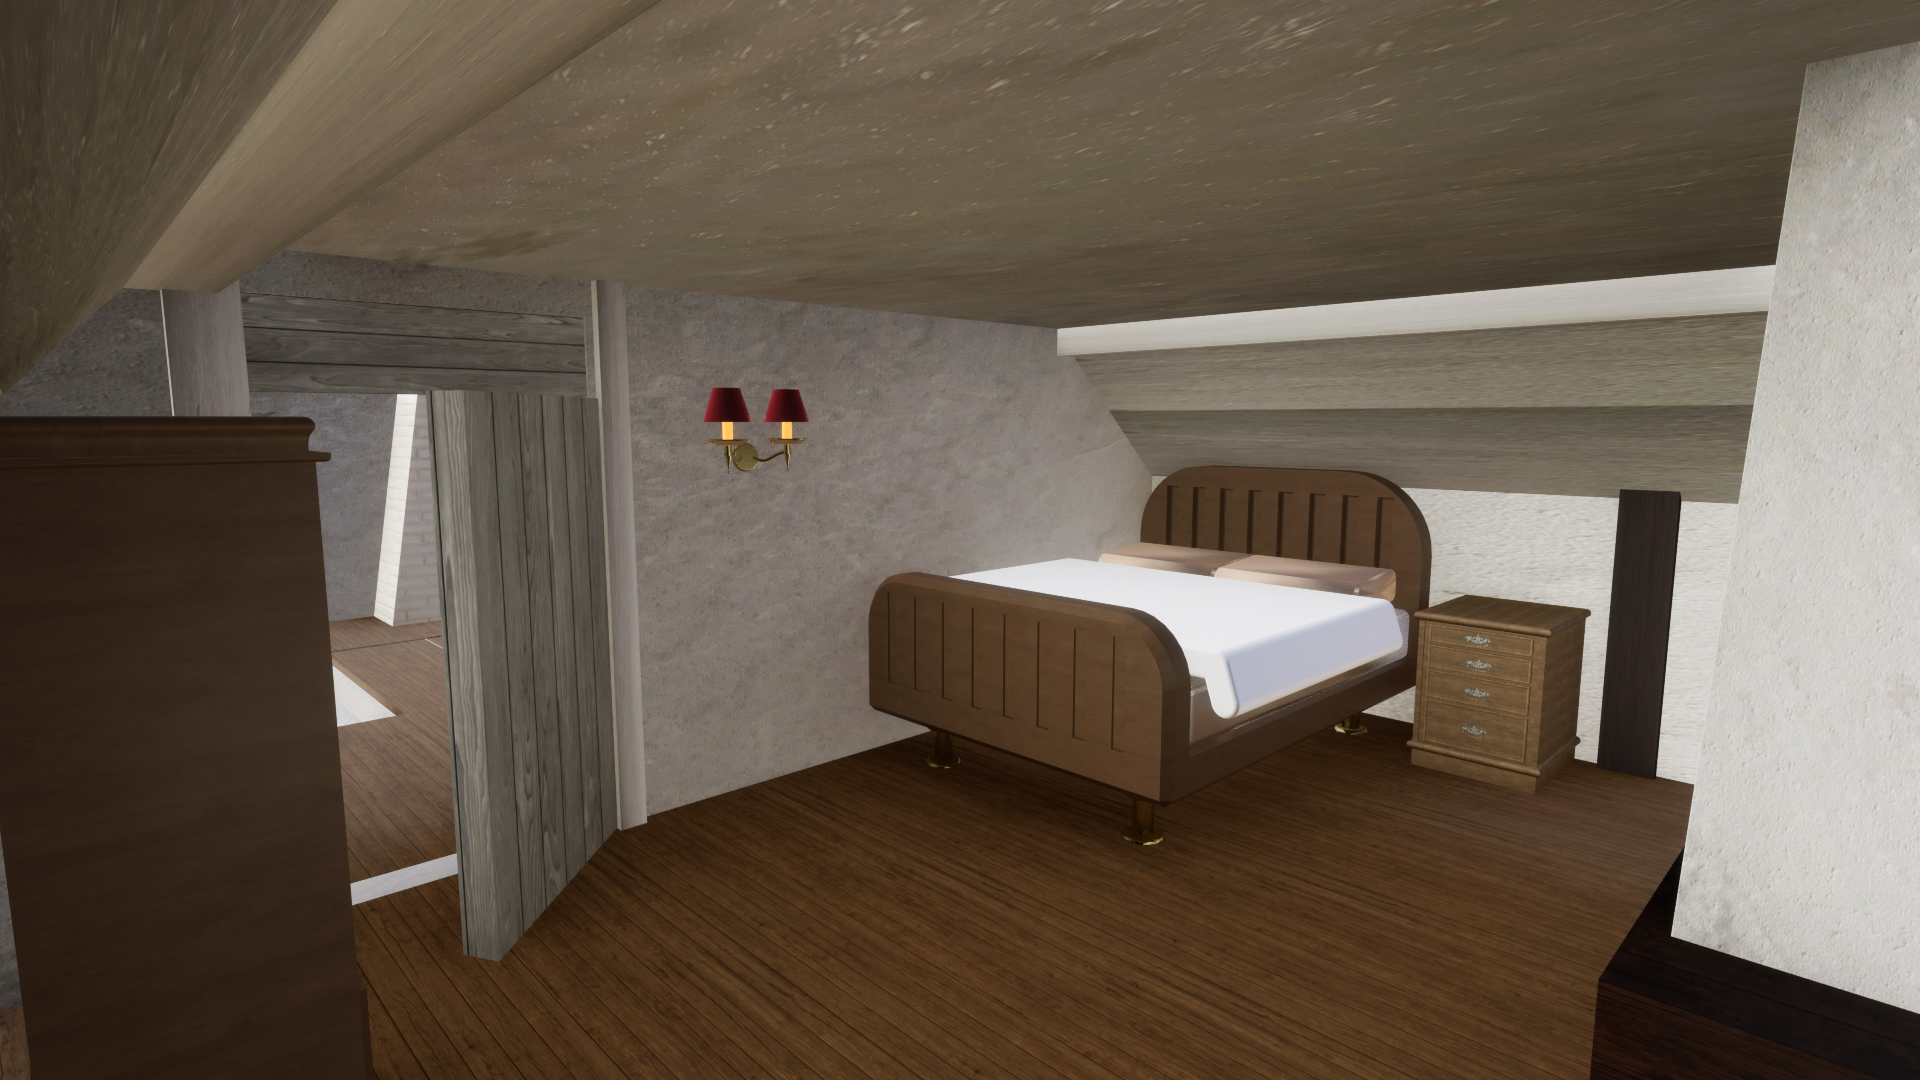
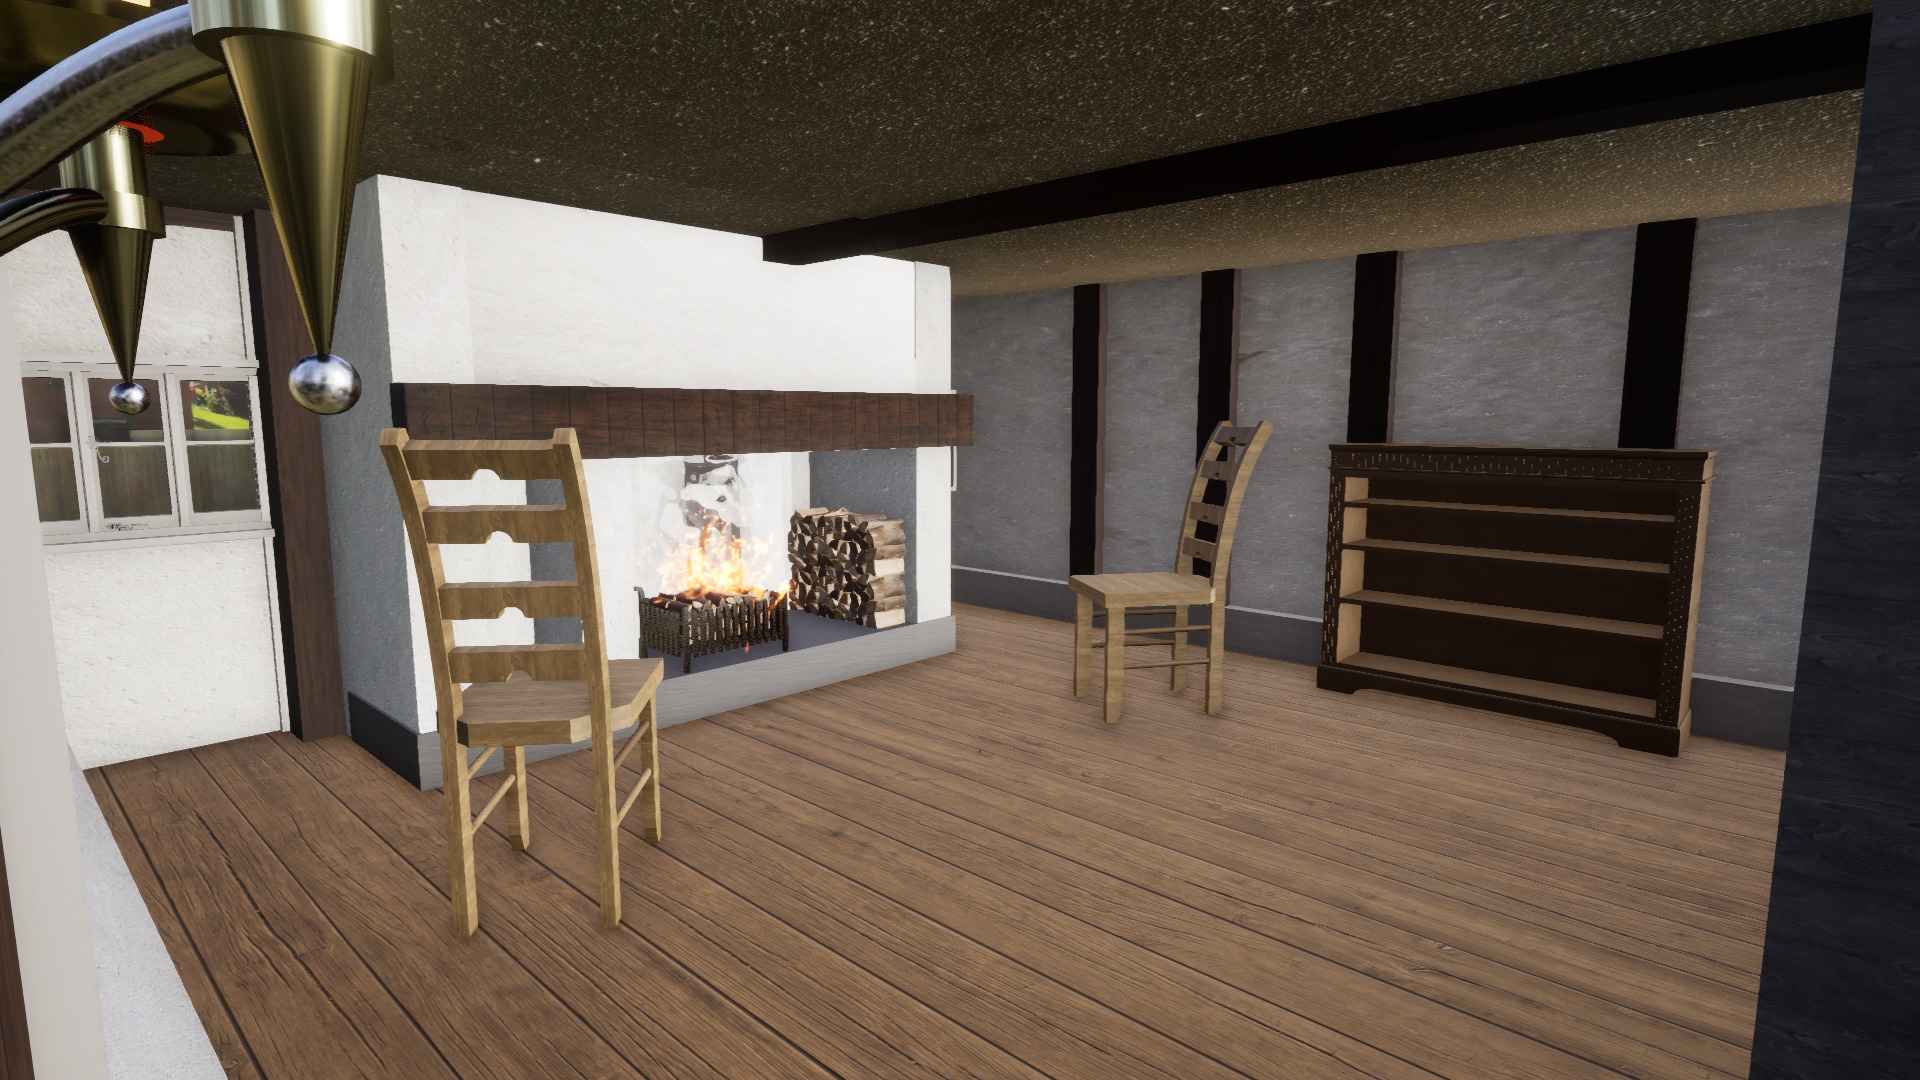
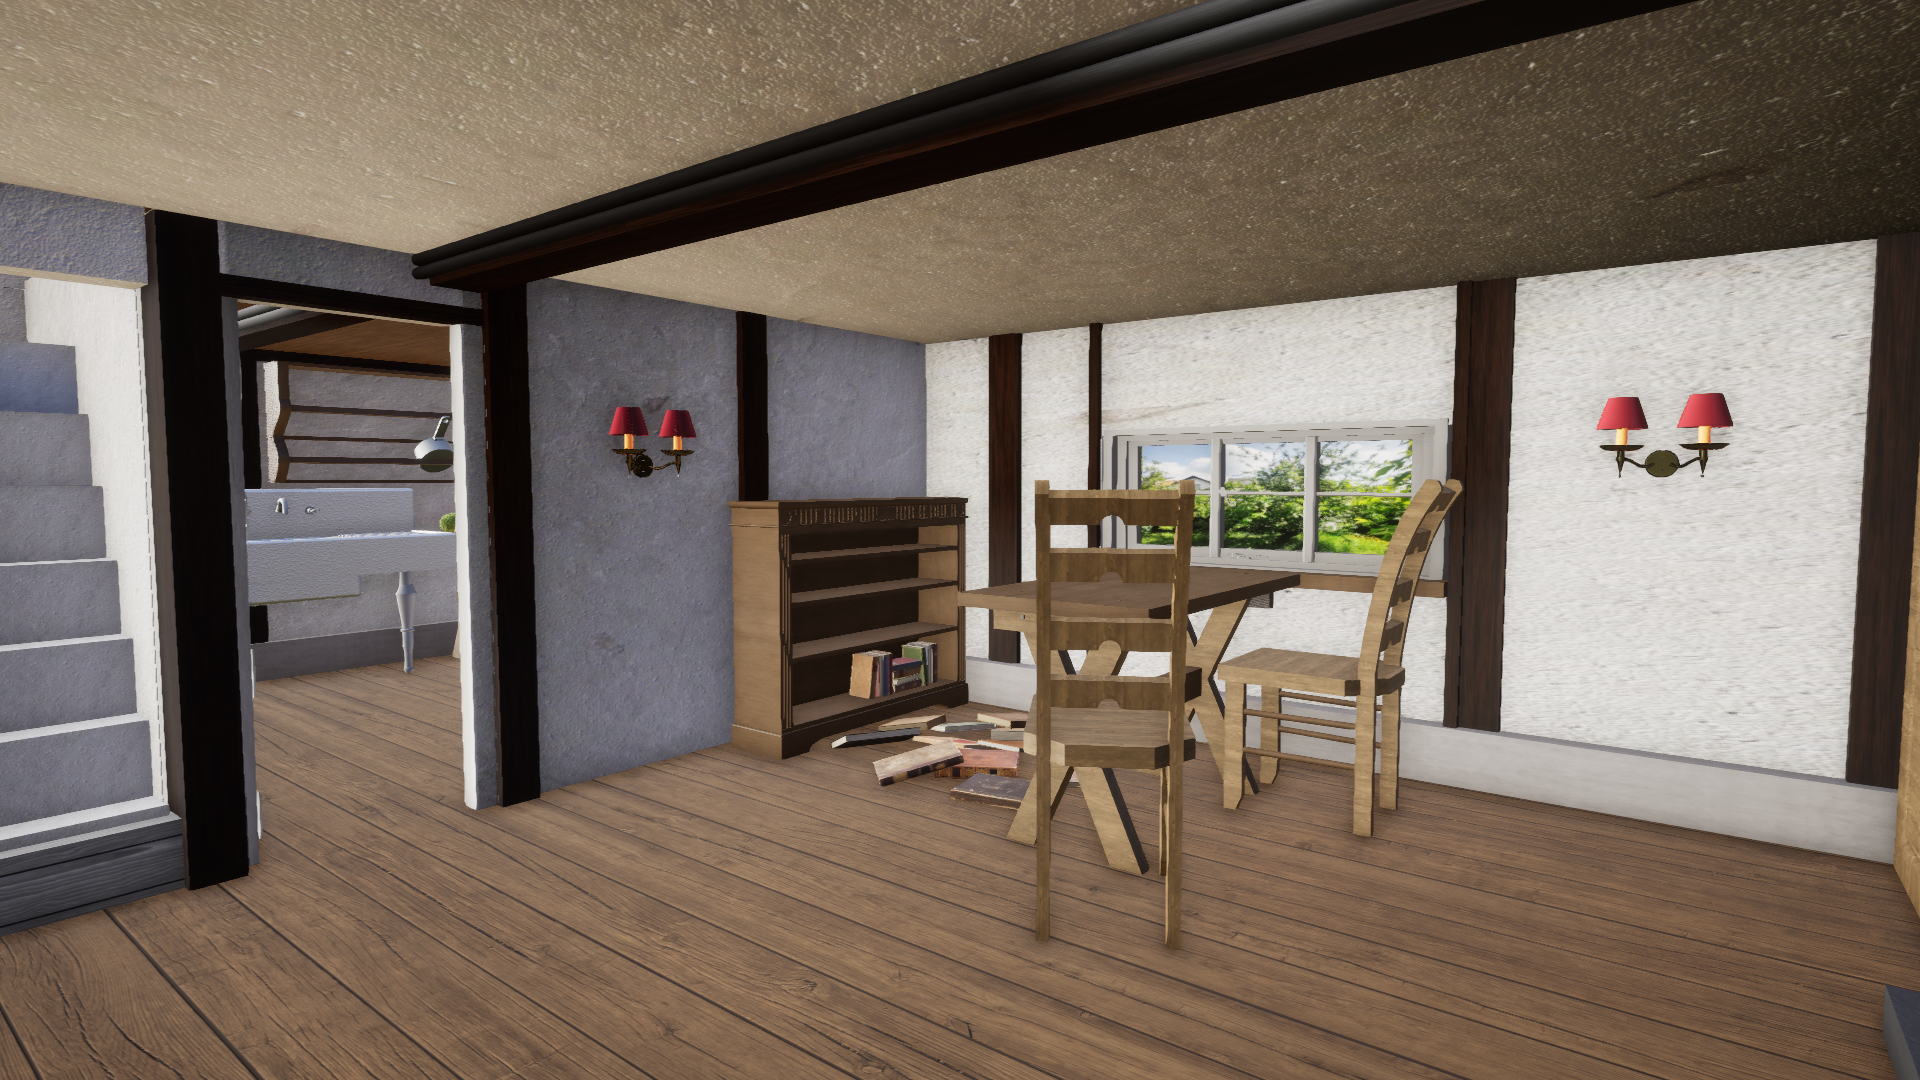
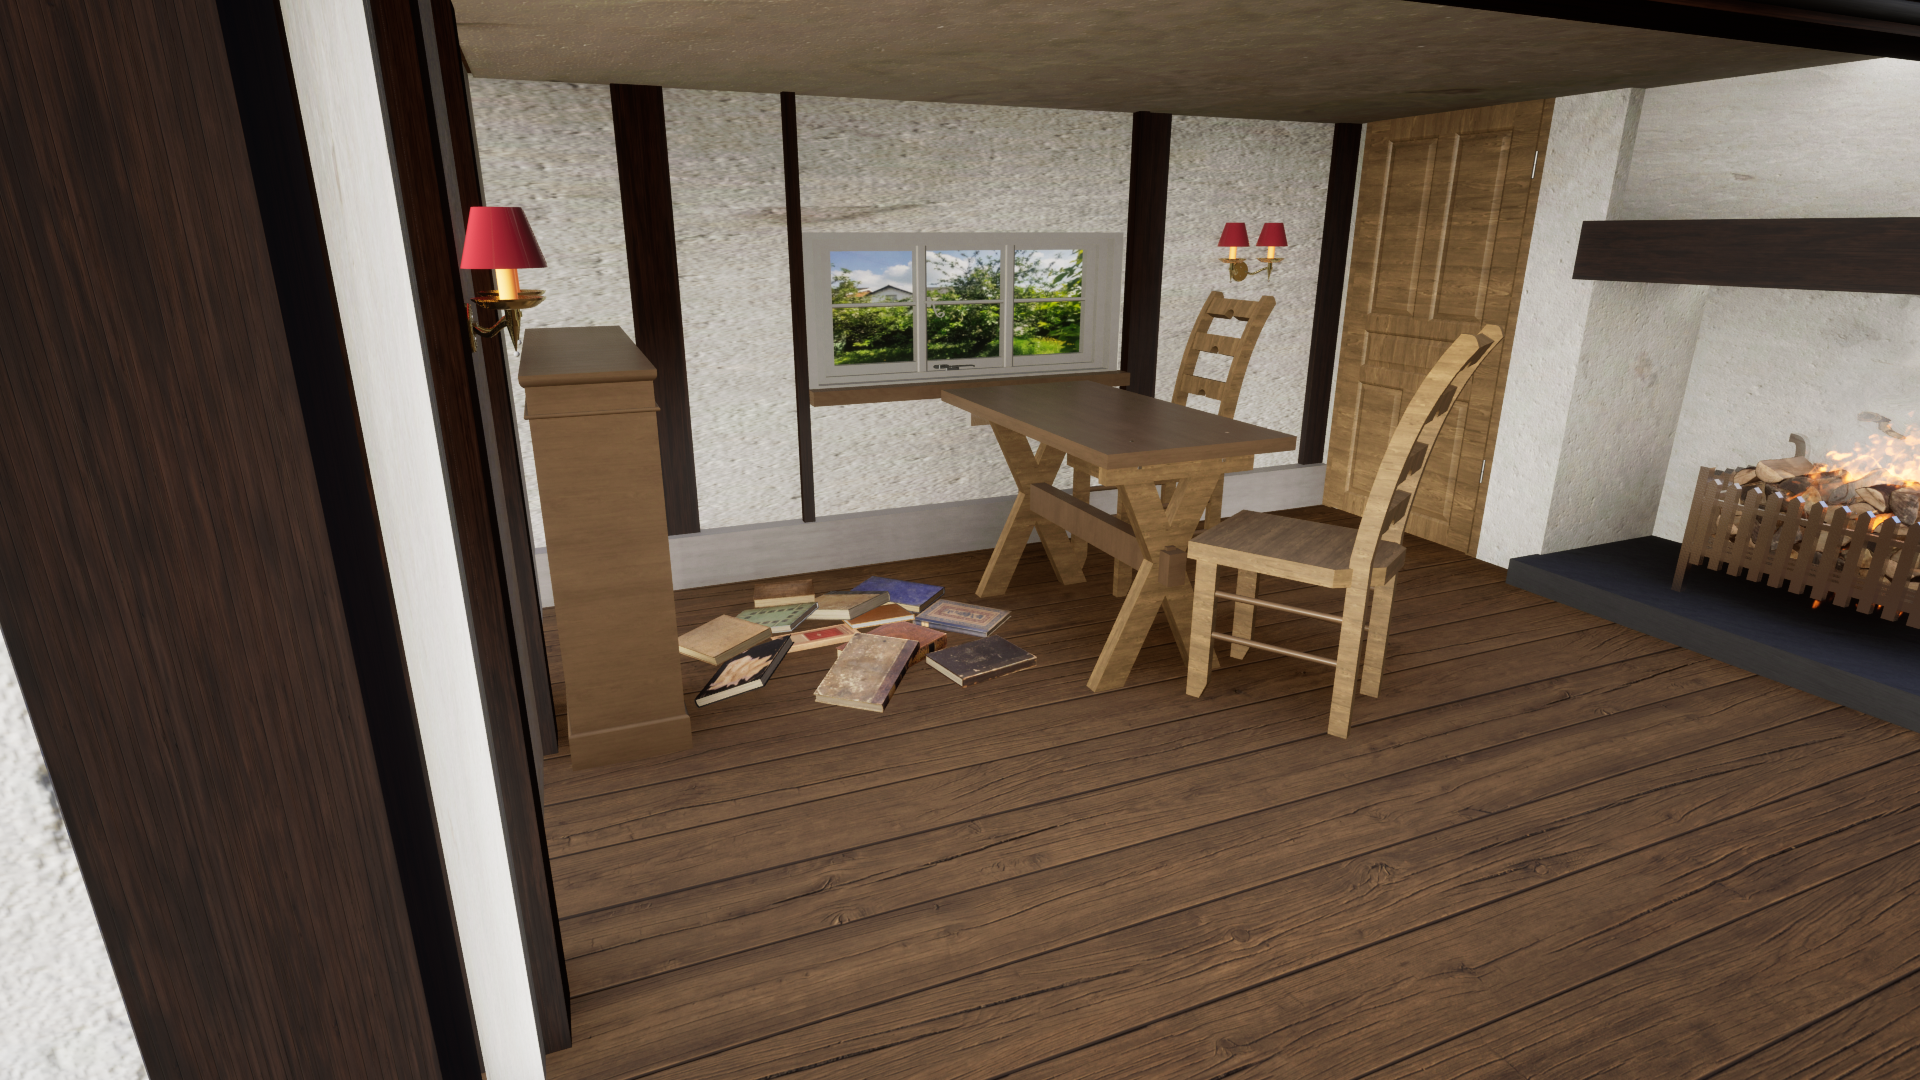
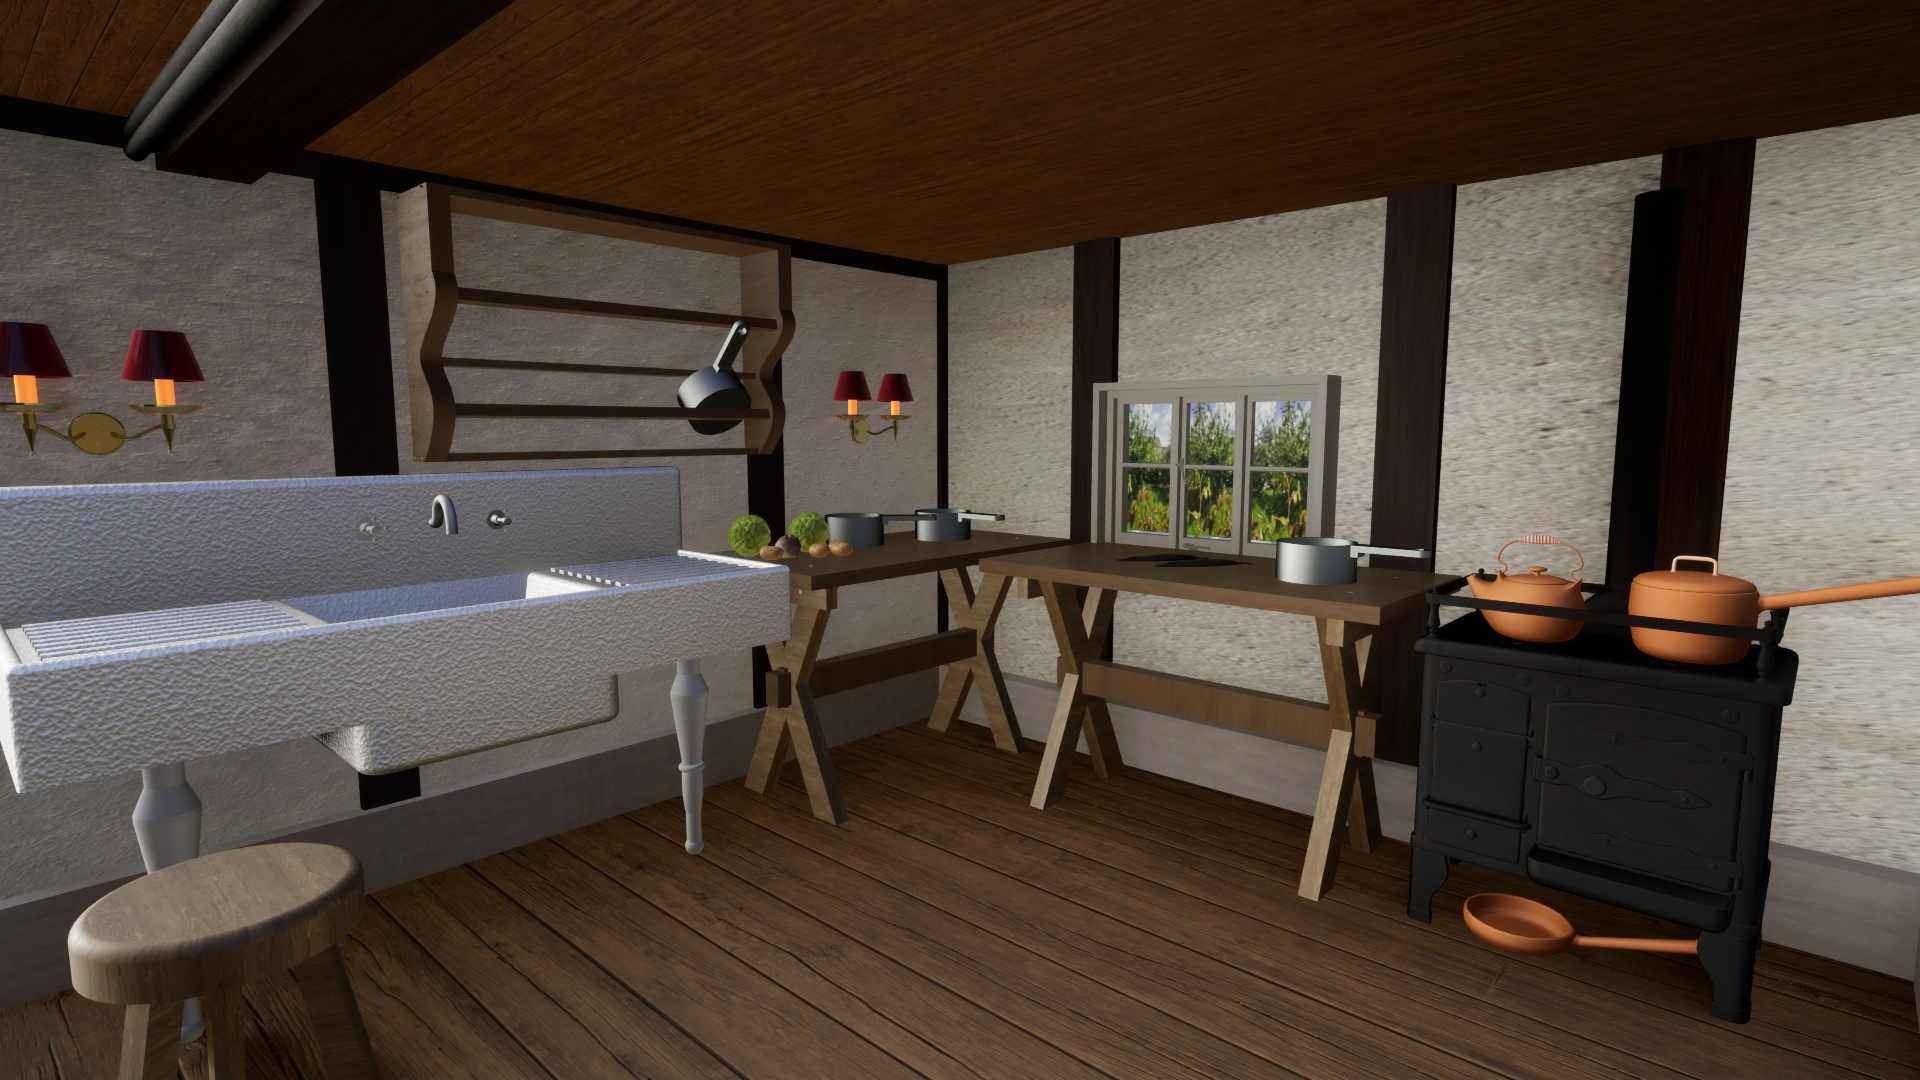
Once the cottage model was made, the scenes were feeling very empty therefore I though it necessary to produce assets in order to fill the space and represent the use of the rooms more accurately. In order to produce these assets I decided to use fusion 360 as this was the software I had the most experience in therefore allowed the most detail in theses assets. To begin with I started to produce assets for the 1500’s period as this the period I though we was designing for however this was actually later in the students plan of tasks to be completed therefore after realising I began creating a variety of 1900’s assets to fit the cottage. The rooms included a bathroom, 2 bedrooms, a kitchen space and 2 living spaces which I had to account for making furniture suited for each room, I originally asked a group member to assist me in making the assets to fill the space however they never managed to produce these for me therefore this was a challenge I had to overcome producing them on my own on top on the cottage model for rendering.`
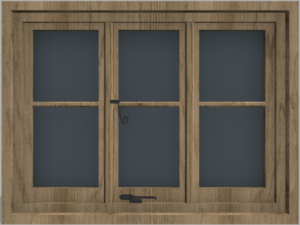
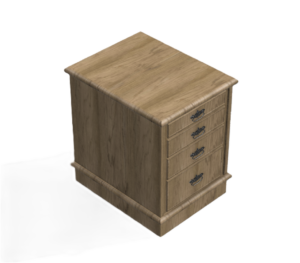
In order to accurately produce assets for this project it required me to research a variety of furniture during the 1900 period. This includes cupboards, shelves, bookcases, wardrobes, beds, lights, chairs, toilet, bath, sink and a fire grate. Most of these I designed and produced myself on fusion 360, however due to time limits with the end of year exhibition some assets I decided to use off Sketchfab which have been referenced below these included the toilet, wood fire stove and books.
1900’s


1500’s

Combinations and rendering
In order to combine all my assets together I decided to use Twinmotion as my software as this is the software I am most capable with for rendering, however one issue with Twinmotion that I have realised previously is that it only applies materials to whole bodies not faces specifically therefore I came across a problem with my rendering as I had been following a tutorial it suggested me join all my bodies together using the Boolean tool as mentioned previously this therefore lead me to having lots of large bodies made of several components which was not ideal when applying materials as they would all have the material applied, in order to get around this I attempted to remove the bodies and split those I needed to be separate however I was unable to find a feature possible to do this after joining therefore, as a result of this I had to edit these large bodies and remove the sections I wanted to edit individually such as the beams this lead to me having to delete and reproduce the beams again all around the model.
To begin with to add another level of detail I wanted to provide an environment similar to the clients property so it looks appropriate to look out the window using the Twinmotion HDR environments to create a sky dome around the scene to be seen whenever you would look out the window.
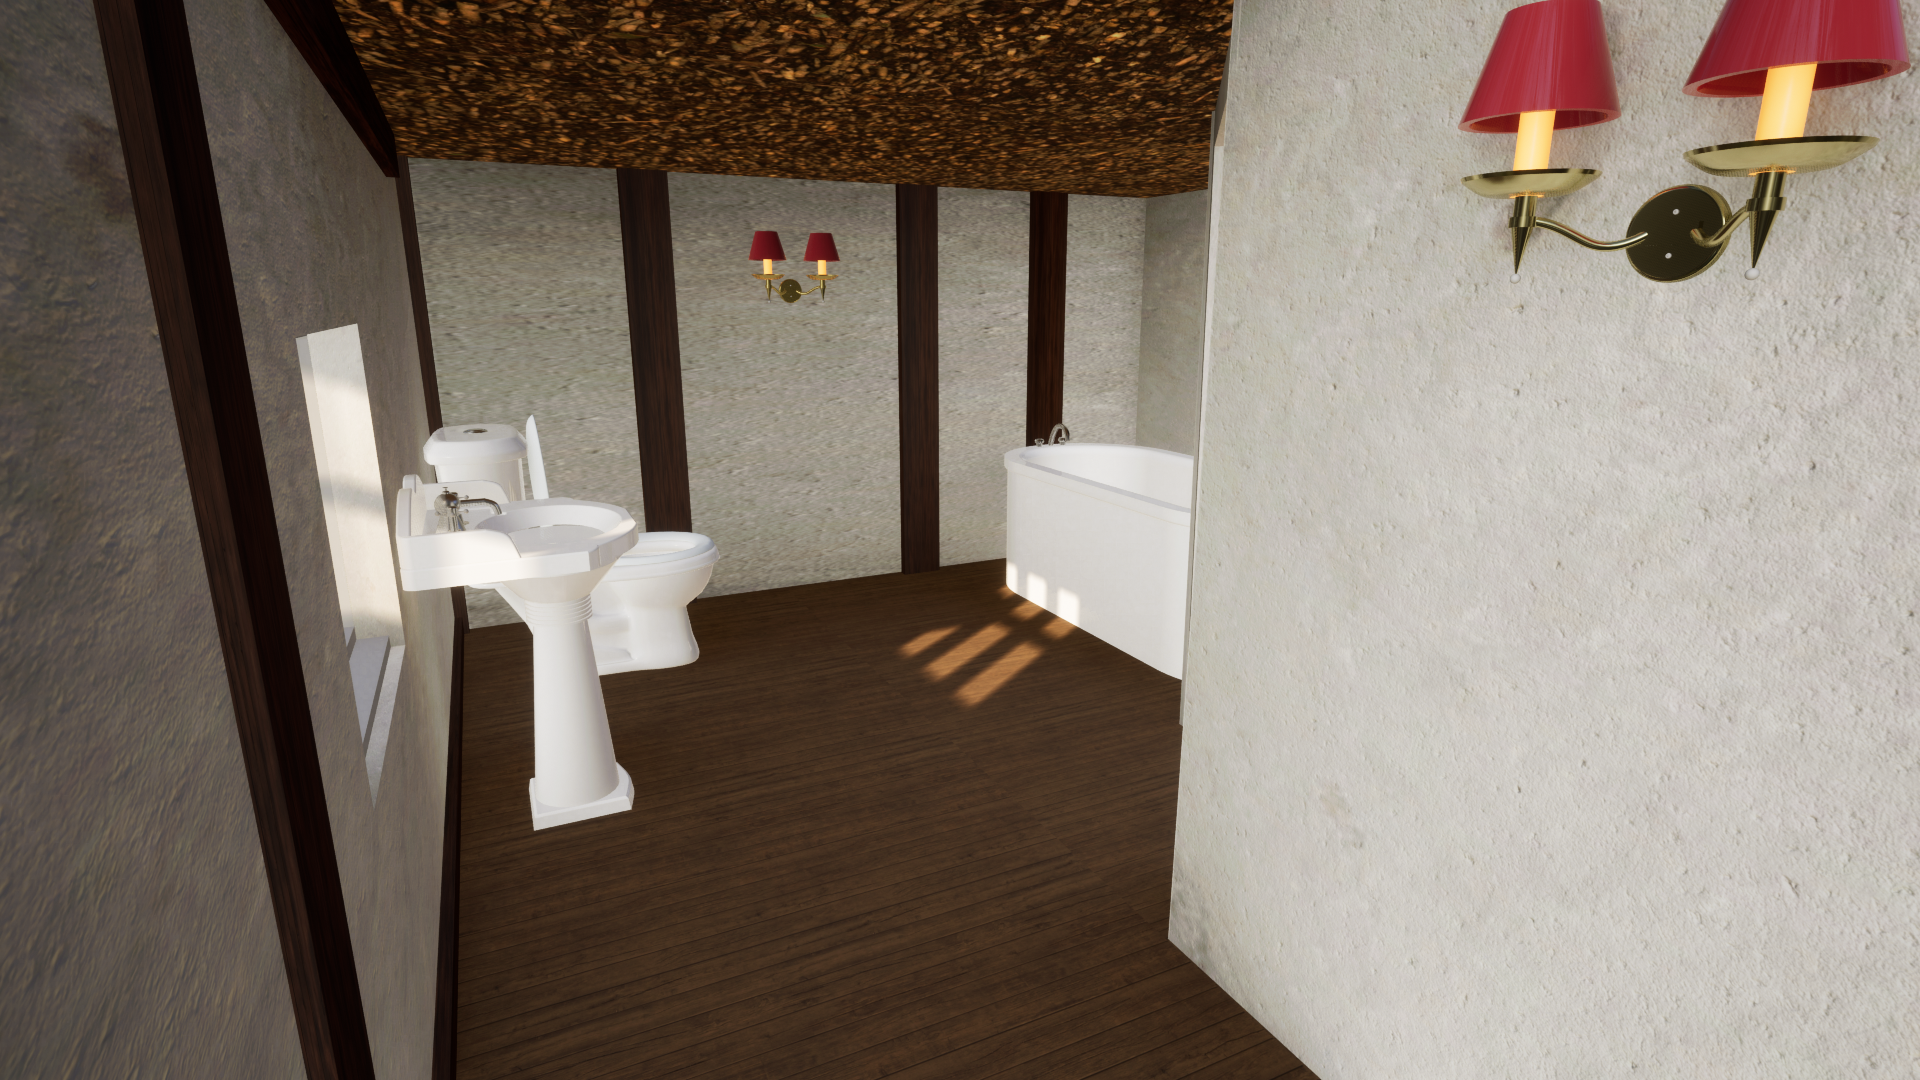

Additionally as mentioned previously photos were taken around and some within the property of the walls and beams in order to be applied as textures for my model to make it more historically/visually accurate. To do this in Twinmotion you simply have to create a new material, open the colour drop down menu and apply the image as a texture, then under the UV drop down menu you can change the scale and use the x, y and z axis you can rearrange the texture so it is applied to your preference.
Further more an additional stage I tried to work on was showcasing the scene during different times of the day and with different weather such as snow and rain. For this I was easily able to produce my renders during the night time as I could re-render at a different time of day, which I choose as 21:00 as I believed this was a good time to showcase the effect of night time and the lighting within the home.

The renders below showcase the snow and rain outside the windows with slight changes in lighting from the outside also.

Client feedback
After attending the University of Winchesters end of year exhibition, I was met by my client in which they reviewed the work I had been presenting and asked for feedback on to improve in which they were very pleased with and only had some small details they wanted changed and some errors while rendering I hadn’t have noticed. These included the black walls which were meant to have the wall texture applied to them, the implementation of the bricked up fire place in the main bedroom, the addition of the banister going up to the bathroom and main bedroom, plus the addition of some missing beams around the model and added details to the ‘landing’ area such as the downstairs fire place chimney which have been labelled in the images below.
Conclusion
In conclusion I believe this assignment has gone well I have managed to produce a variety of historically accurate scenes for my chosen client in order to progress with their own academic work including client feedback to make it what they want. In this project I have managed to gain a basic understanding on a new software appropriate for the industry I wish to enter into, however I wish I gain a better understanding on it, therefore this is something I will continue to develop for and in my upcoming projects. Though my render skills are good in my understanding, I wish to improve these further as I wish to produce more visually realistic models in the future. Another feature I wish to improve on is the fact I use 2 separate software’s and combine them together, for the futures I aim to be able to miss out using fusion 360 and produce all my models and assets in 3ds max with the amount of detail necessary to then be rendered.